
.webp)
Postman is currently one of the most famous tools for API Testing. This tool is very popular if you need to dissect the RESTful API made by others or if you want to test an API you have made yourself.
But what do we exactly mean by an API? API stands for Application Programming Interface which helps software applications to interact with each other via API Calls.
Postman began as a side project to simplify the workflow of an API during testing and development.
After reading this short introduction you must be wondering why Postman is so popular among the crowd.
There are various reasons for the popularity. Let’s begin by discussing reasons first, then we will go to Step by Step installation guide of Postman.
- Using Postman just needs you to log-in to your account and here you go. You can access all your files anytime, anywhere. All you need is a postman desktop application.
- Postman helps to organize test suites by allowing collection creation for API calls. Each collection can create multiple requests and subfolders.
- It is possible to create, export, and import collections. Thus, making it easier to share files. Collections can be shared via direct link.
- Having multiple environments aid in less repetition of tests as the same collection can be used but for a different environment.
- Test Checkpoints can be added to each API call, thus ensuring test coverage.
- Using Collection Runner or Newman helps in automating testing where tests can run in multiple iterations, saving time for repetitive tasks.
- Postman is able to support Continuous Integration.
After having such a detailed discussion, You must now a bit convinced that Postman is not a bad choice. In Fact, it deserves to be in the top 5 list.
Let’s quickly start discussing the steps to install and download Postman. So, that we can start working on it.
Postman is an open-source tool.
Steps to Install Postman
- Follow the link to download the Postman software. Choose your desired platform from Windows, Mac or Linux. If you chose Windows, choose from 32 -bit or 64-bit.

- Once downloaded, run the executable file.

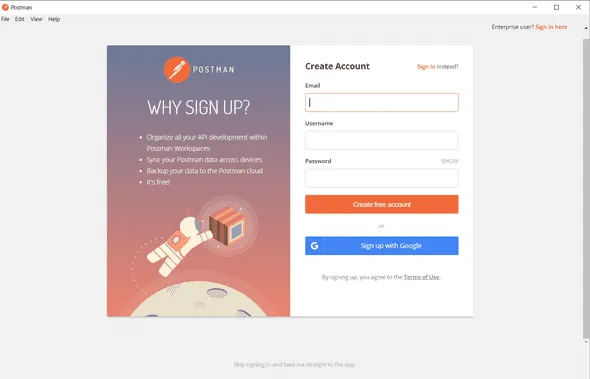
- There are 3 ways to use Postman:
a. Sign-up and create your own account and start using Postman.
b. Sign-in using Google Account and start using Postman.
c. Skip Sign-up and sign-in procedure and directly start using the software.
In the 3rd case, you won’t be able to access your collections. So, it is better to create an account or sign-in using Google credentials so that your collections are saved and can be accessed later.
- Select the workspace tools you need, and click on Save My Preferences.
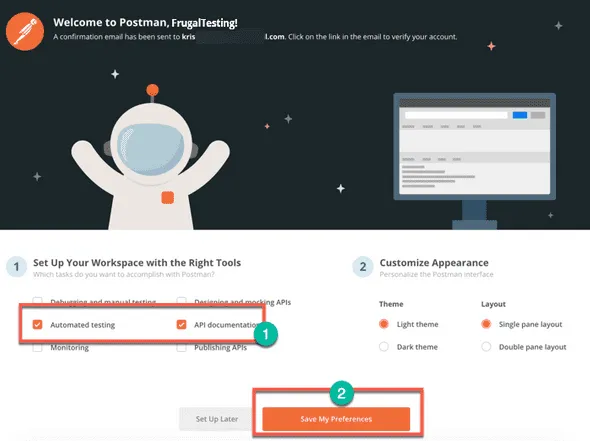
- You will see the startup screen.

How to Use Postman
If you clearly observe the screenshot below, you will see that the workspace itself is a puzzle with so many pieces. In order to solve this, you need to have a basic knowledge of the basic pieces. Let’s start discussing a few of the important components of the workspace.
- New: This is used to create new building blocks like request, collection or an environment or alternatively you can also create advanced components like Documentation, Mock Servers, Monitor.
- Import: This helps to import a collection of an environment. It supports the following types of import options:
a. Import from a File
b. Import from a folder
c. Import from a link
d. Paste Raw Text. - Runner: It is possible to run the automation test through the collection runner.
- Open New: This button helps you to open a new tab, Postman Window or Runner Window.
- My Workspace: There are 2 ways to create a Workspace: either a Personal workspace or as a Team. There is also an option to view the Workspace.
- Invite: You can collaborate on a workspace by simply inviting the team members.
- History: Past requests sent by you will be displayed in this section. There is also a toggle switch to save responses. This helps in tracking actions easily.
- Collections: Collections help in organizing test suites, where the collection can consist of multiple subfolders and multiple requests.
- Request Tab: This tab displays the title of the request you are working on. By default “Untitled Requests will be displayed for requests without any title.
- HTTP Request: This is a drop-down menu listing different types of HTTP Requests. Some of the requests that are available are: GET, POST, DELETE, PUT, HEAD, OPTIONS and many more. Most commonly that are used are GET and POST.
- Request URL: This is the text box asking for the URL with which API will communicate with. This is often referred to as endpoint.
- Save: In case of changes in a request, click on the Save button to commit the new changes and prevent them from being lost or overwritten.
- Params: This holds the parameters like key values for the requests.
- Authorization: Proper authorization is needed to access APIs. Authorization can be done using any credential set like username- password, bearer token, etc.
- Headers: You can customize headers as per the need of your organization. Headers like Content-Type JSON can be added.
- Body: This is the main section that can be customized in an HTTP Request. Most commonly POST Request requires customization inside the body of the request.
- Pre-request Script: pre-request scripts are used for setting the environment to ensure tests will be executed in the correct environment. So, these are the scripts that are executed before running an actual request.
- Tests: These are the scripts that are executed during a request to set up checkpoints like to verify if the retrieved data is as expected if the response status is ok and many more.
How to execute various HTTP requests in Postman
- Working with GET Request.
- Working with POST Requests.
- Parameterization of Requests.
- How to Create Postman Tests.
- How to Create Collections in Postman.
- How to run collections using Runner and Newman.
1. Working with GET Requests:
GET Requests are used to retrieve information from the specified URL.
We will be using the following URL in our examples:
https://jsonplaceholder.typicode.com/users
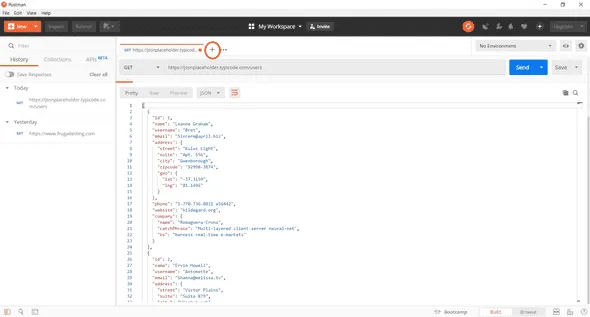
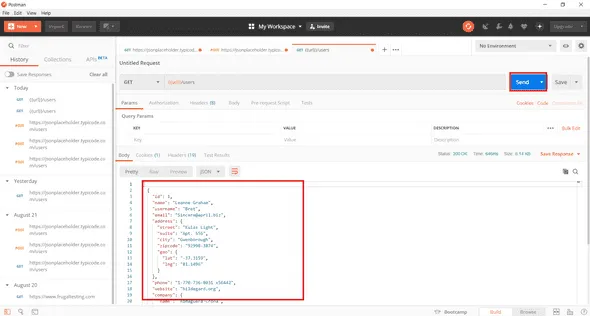
Steps to execute GET Request:
a. In the workspace, set HTTP Request to GET Request type.
b. In the request URL field, input the URL -
https://jsonplaceholder.typicode.com/users
c. Click the Send button.
d. On successful completion of the GET Request, you will see 200 OK Messages. It might be possible that GET Request failed to execute. Reasons can be two- one the requested URL is invalid or authentication is needed.
NOTE: There is no data manipulation at the endpoint in the case of GET Requests. The user just queries a page. User is not allowed to send data to manipulate the page.

2. Working with POST Requests:
POST Request is different from GET Request in the sense that Users here are involved in manipulating endpoints. Using data from the results of the previous example. Let’s add a new user.
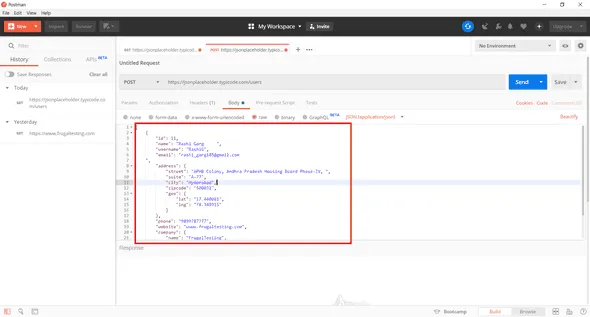
1. Click on the + sign to create a new request.
2. Select the HTTP request type to POST Request.
3. Input URL as previous example: https://jsonplaceholder.typicode.com/users.
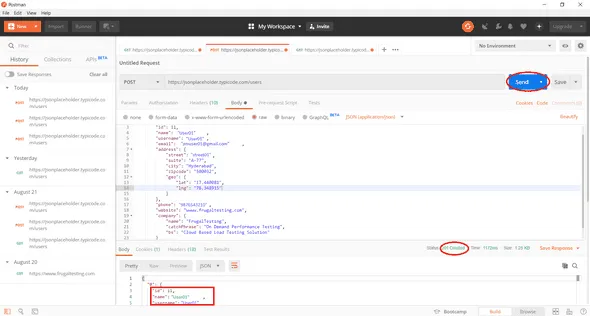
4. Switch to the Body Tab. Here we will type the code with correct curly braces to add a new user.

5. Click raw and then select JSON.

6. Copy and paste complete details of one user from the output of the previous example.
NOTE: change the id of the user to 11. You can also change other details also. But changing id is mandatory.
.webp)
NOTE: The POST Request should have the correct format. Please check the format of the JSON request. You can use tools like this.
7. Click the send button.
8. Status 201: Created shows the success of POST Request.
9. The POST data is shown in the body.
3. Parameterization of Requests:
Parameterization of Request is one of the most important feature of Postman. Variables with parameters can be used instead of using the same request with different data. The data can be from a data file or an environment variable. Parameterization helps to the repetition of the test.
Let’s have a look at the example. Parameters are created using curly braces {{Parameters}}
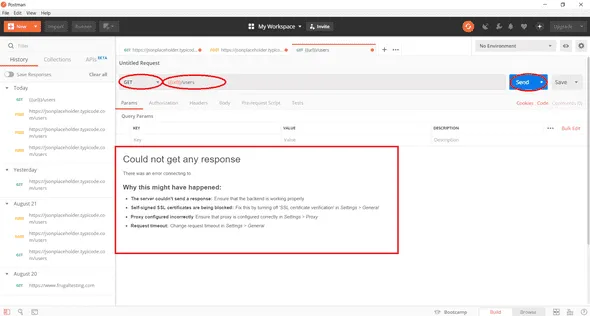
a. Set HTTP Request Type to GET Request.
b. Input URL: {{url}}/users in the text box Enter the URL.
c. Click the send button
NOTE: There will be no response as we have not set the source of the parameter.
4. In order to use the parameter, you need to set the environment. Click on the eye icon.
5. Click edit and set the variable to the global variable in order to make it accessible in all collections.
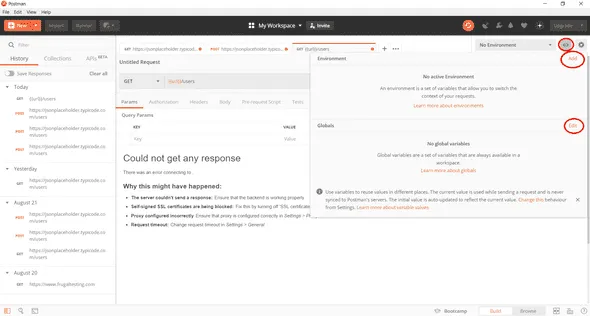
6. In the variable set the name of the URL as https://jsonplaceholder.typicode.com
7. Click the Save button.

8. Click Close if you see the next screen.
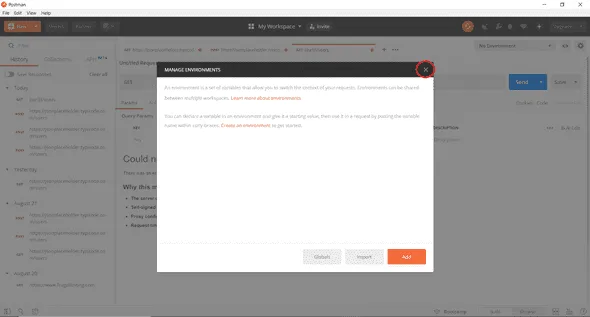
9. Go back to the GET Request screen and click the Send button. This time you will be able to see the results.
NOTE: Please ensure that parameters have a source like a destination file or an environment variable.
4. How to create Postman Test
Postman Tests are Javascript codes added to the requests to verify the results such as successful or failed status etc. /it can be compared to assert and verify command in other tools.
- Go to GET Request from the previous example.
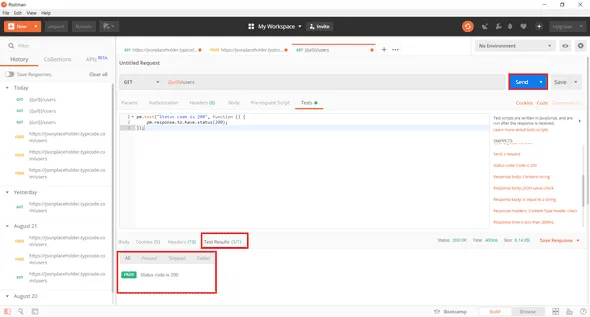
- Switch to Test Results.
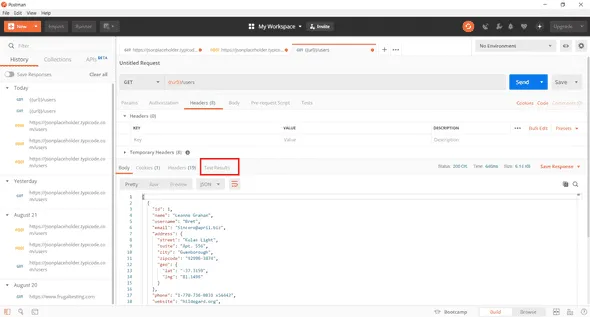
- Switch to Tests tab. On the right side are snippet codes.
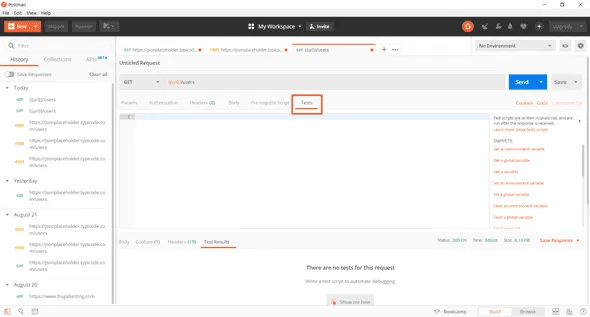
- From the snippets section, click on the “Status code: Code is 200”. You will observe that the pane is auto-populated.
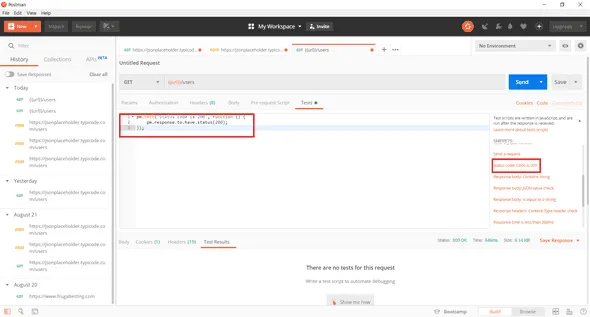
- Now click the send button. You will see the test results.
- Let’s generate another test. Go to the test tab.
- From the snippets section. Click on “Response body: JSON value check”. We will be checking if Ervin Howell has user id 2.
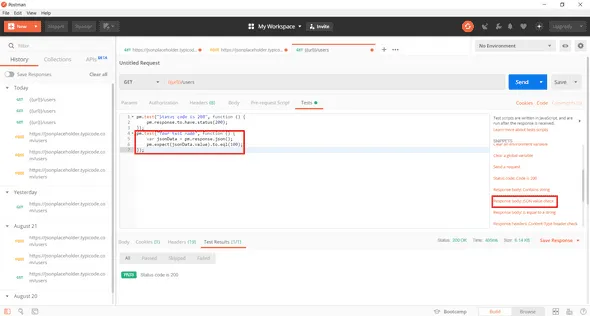
- Replace “Your Test Name” from the code with “Check if user id 2 is Ervin Howell” so that test name gives a clear description of what we intend to do.
- Replace “jsonData.value” with “jsonData[1].name”. This works like an array indexing where the first result starts at position 0, second from position 1 and so on.
- Replace value 100 in the method “to.eql(100)” with “to.eql(“Ervin Howell”)”.
- Click the send button.
- There will 2 PASS Test Results for your test.