
Cucumber is a testing framework which supports BDD Behavior Driven Development. It helps us to define the application behavior in a simple plain english using a simple grammar defined language Gherkin. Cucumber is written in Ruby, but it can be used to test code written in Ruby, Java, C#, Python and many more.
In this series of articles we will be discussing
- Setup Cucumber with Selenium in Eclipse
- Cucumber Basics
- Data driven Testing
Setting up Cucumber is not a simple tsk. It has some prerequisites softwares that need to setup correctly in order to use Cucumber. We will start discussing installation of each of the software in detail.
- Download and Install Java
- Download and Install Eclipse
- Install Cucumber Eclipse Plugin
- Download Cucumber for Eclipse
- Download Webdriver Java Client
- Configure Eclipse with Cucumber
Download and Install Java:
Since our tests will be written using Java language, so we will be requiring JDK- Java Development Kit.
- Go to the link and Download JDK.
- Double click the JDK and follow the installation steps.
- Next step is to setup the Path variable in System Variables.
- Set Path variable to the path of bin folder in jdk directory like “C:\Program Files\Java\jdk-12.0.2\bin”
NOTE: Replace this with path of bin folder in your jdk directory. This is for illustration purpose only.
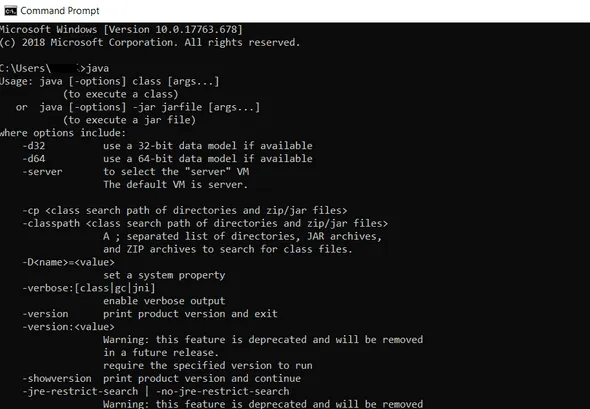
- Open a command prompt and type java. If you can see some output, it means the path is set correctly and now jdk ready for use.
Download and Install Eclipse:
Eclipse is an Integrated Development Environment (IDE). We are going to use eclipse to write, compile and run test scripts.
- Go to the link and Download the Eclipse.
- Double click the downloaded file and follow the steps to install eclipse.
Install Cucumber Eclipse Plugin
Cucumber Eclipse Plugin is not the main cucumber eclipse plugin for running the test as BDD. When you write feature file for the cucumber test, the code for the feature file is not highlighted.
Cucumber Eclipse Plugin helps eclipse understand the basic Gherkin syntax and works like a syntax highlighter. Highlighting syntax makes it more readable and clear. It also helps to run feature file without the help of JUnit.
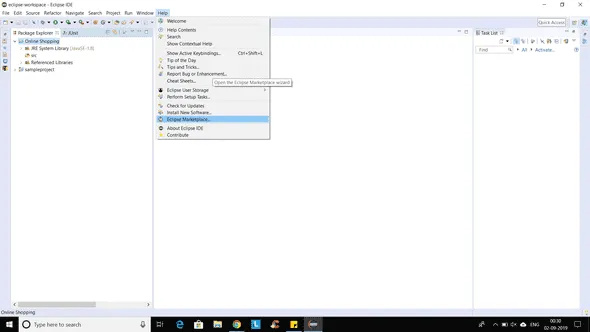
1. Firstly, launch Eclipse IDE. Then hover to the Help Menu and click on "Eclipse Marketplace"
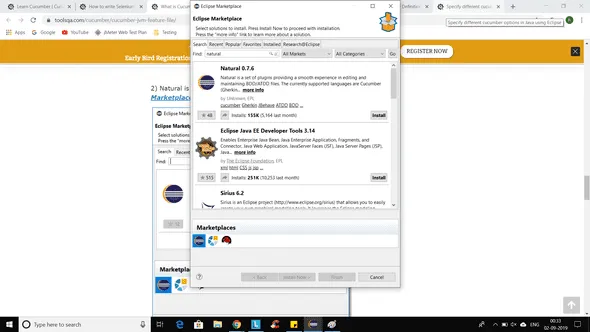
2. A dialog box would be shown. Within that, click "Search" tab, present below "Select Solutions to install" field.
.webp)
3. Type in "Name- Cucumber" and Click on "Enter" button.
.webp)
4. On the block you would find the " Cucumber Eclipse Plugin 1.0.0.202106240526 ." Click on the "Install" Button.
5. This will begin the installation of " Cucumber Eclipse Plugin 1.0.0.202106240526 " as shown in the Image below
.webp)
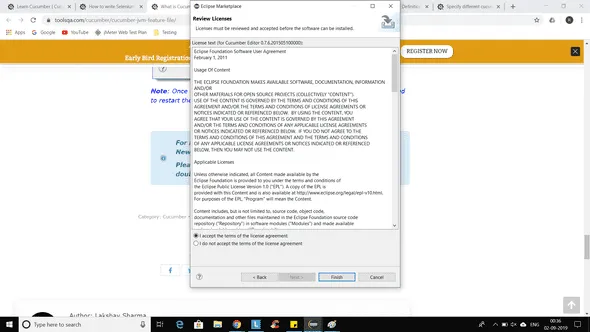
6. After completion of Installation you would be redirected to Review Licenses window where you can click on "Finish" Button
7. It would take some time to perform internal plugin installation on Eclipse IDE.
8. Click on "Restart Now" Button, which will then restart the IDE.
.webp)
9. Installation is completed.
Download Cucumber for Eclipse:
In this step we will download the cucumber jar files for Eclipse. Cucumbers functionality is abstracted in jars. We will be using Online Maven Repository to download the jar files.
- Cucumber-core
- Cucumber-java
- Cucumber-junit
- Cucumber-jvm-deps
- Cucumber-reporting
- Gherkin
- Junit
- Mockito-all
- cobertura
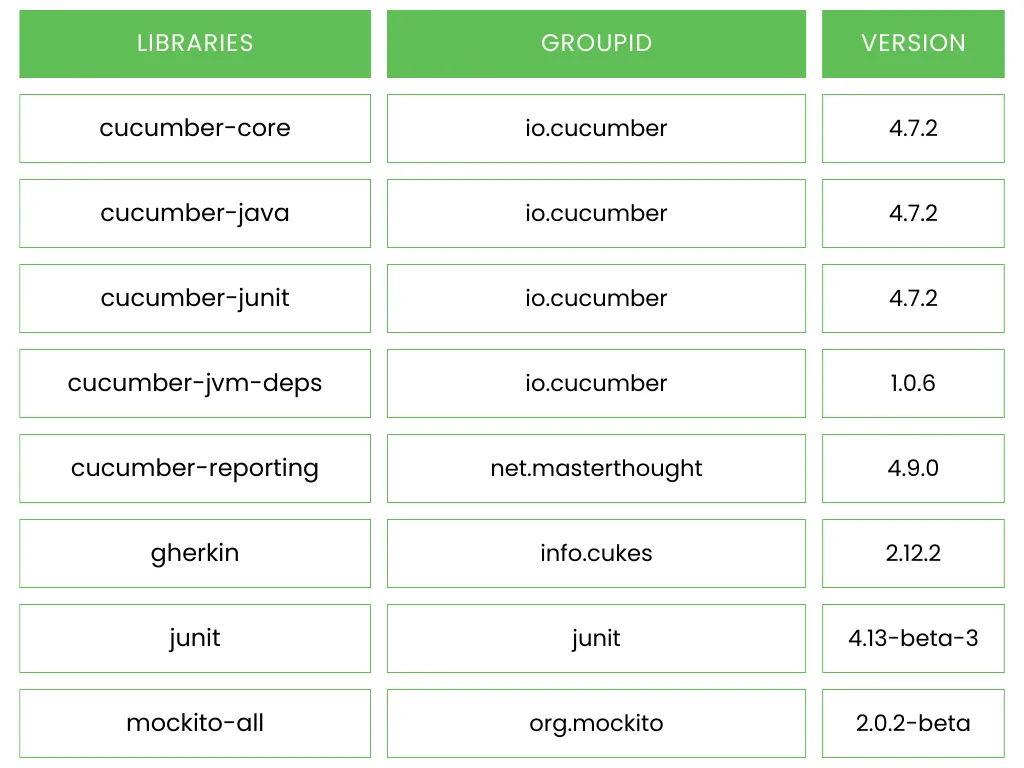
Steps to download all the above mentioned jar files:
- Go to link
- Search for cucumber-core in the Central Maven Repository. It will return the list of cucumber core jars. Click on the download button. I have downloaded jar file with Group Id-

- It will display a popup and ask to save the “cucumber core jar” file.
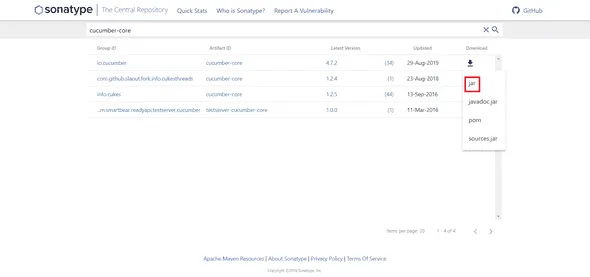
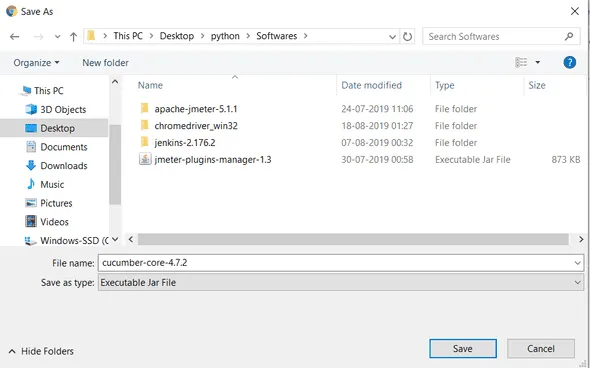
- Just like this, search for all the jar files mentioned in the list above and download one by one.
- Please Note the version of cucumber core, cucumber java, cucumber junit jar files should be the same.
I have downloaded following versions

Download Webdriver Java Client
Selenium supports many languages and each language has its own client driver. Here we are configuring Selenium 4 with java so we need "Webdriver Java Client Driver".
- Go to Webdriver Java client download page for Webdriver download file. Click on the "Download" option in front of Java Client Driver.

- Save the .zip file to the disk.
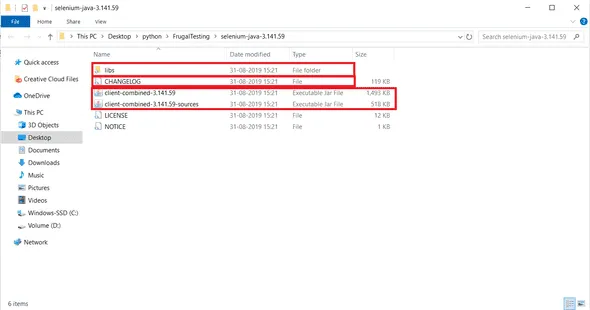
- Extract the zip file
- Open the Selenium folder, you will find a libs folder, 2 jar files and a change log. We will be using these to configure Webdriver in Eclipse.
Configure Eclipse with Cucumber
In order to configure Cucumber with Eclipse. We first need to launch the Eclipse, create a workspace, create a new Project and finally add External Libraries to the Project. Follow the steps below to correctly Configure Cucumber with Eclipse. If you listen to my advice, It is better to read one step and execute it at you end before going to the next step.
- Launch Eclipse. The first time you launch eclipse, you will be prompted for the path for the Workspace folder, where all projects will be saved. There is also an option to Switch the workspace, in case in future you want to switch the workspace.
- Create a new Java Project by clicking on File-> New->Java Project.

- Give your project a name” Online Shopping” .

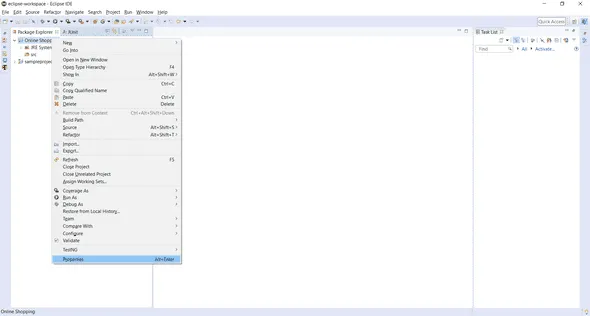
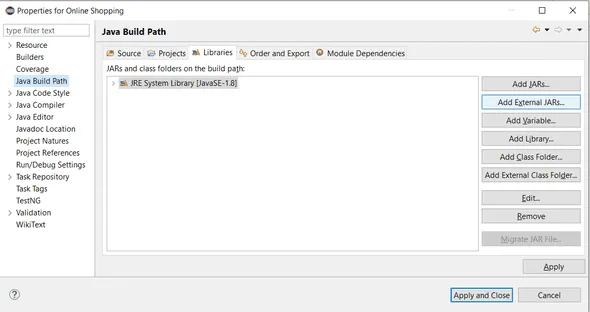
- Add Selenium Jars: Right Click on project “Online Shopping”-> Select Properties->Java Build Path.

- Navigate to Libraries tab and click Add External JARs.
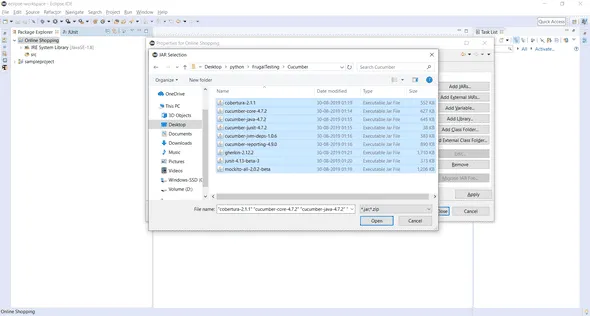
- Add all the jar files from the Selenium folder and libs folder inside selenium folder.


- Click OK Button.
- Add Cucumber JARs: Right Click on project “Online Shopping”-> Select Properties->Java Build Path.
- Add all Cucumber Jar Files and Click the Open button.
- Click the Apply button.
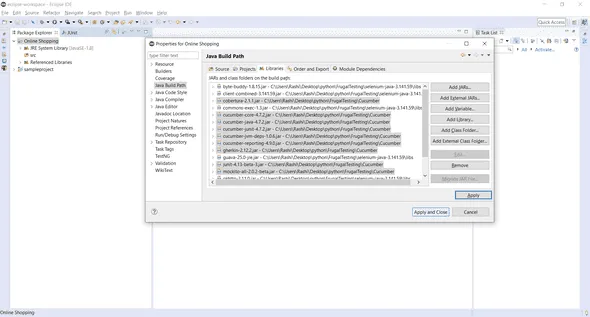
- Click the Apply and Close button.
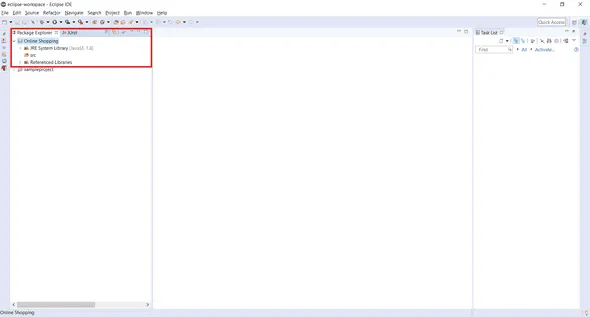
- This is how the project looks like in Eclipse.
Steps to create Folder Structure:
- Create a new package by Right click on src folder-> New-> Package.
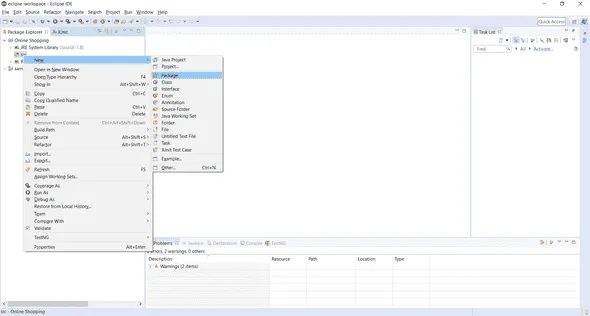
- Name it as “cucumberTestScript” and click on Finish button.

- Create another folder by Right click on src folder-> New->Package and name it step Definition and click on Finish button.


- Now create a new folder by Right click on project “Online Shopping”->New->Folder.
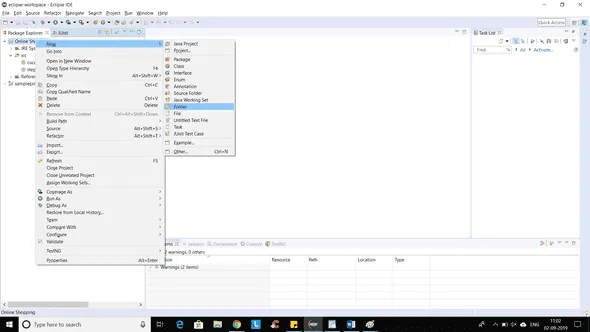
- Name it as “Feature” and click on Finish button.

Steps to write a Selenium Java Test
We will write a simple Selenium Test Script for Login functionality and then convert that script to Cucumber script.
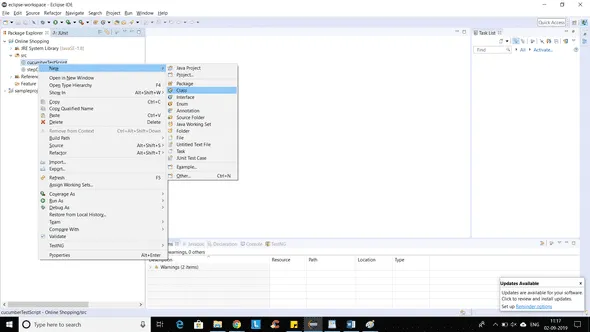
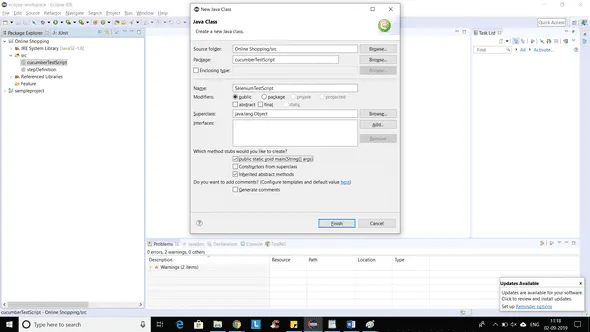
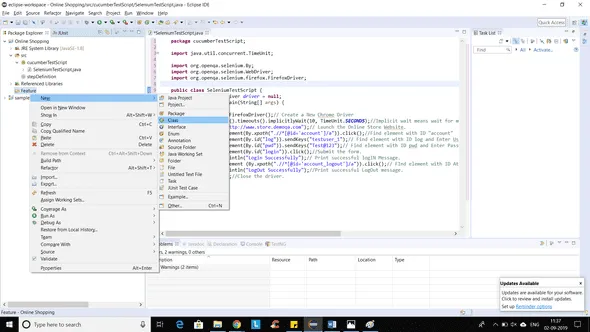
- Create a new class file in cucumberTestScript package and name it as SeleniumTestScript by right click on Package-> New-> Class. Select the option “public static void main” and click on Finish button.
- Now we will write a script that will perform following steps in Selenium:
- Launch the Browser
- Navigate to Home Page
- Click on the LogIn link
- Enter UserName and Password
- Click on Submit button
- Print a successful LogIn message
- LogOut from the application
- Print a successful LogOut message
- Close the Browser
Code:
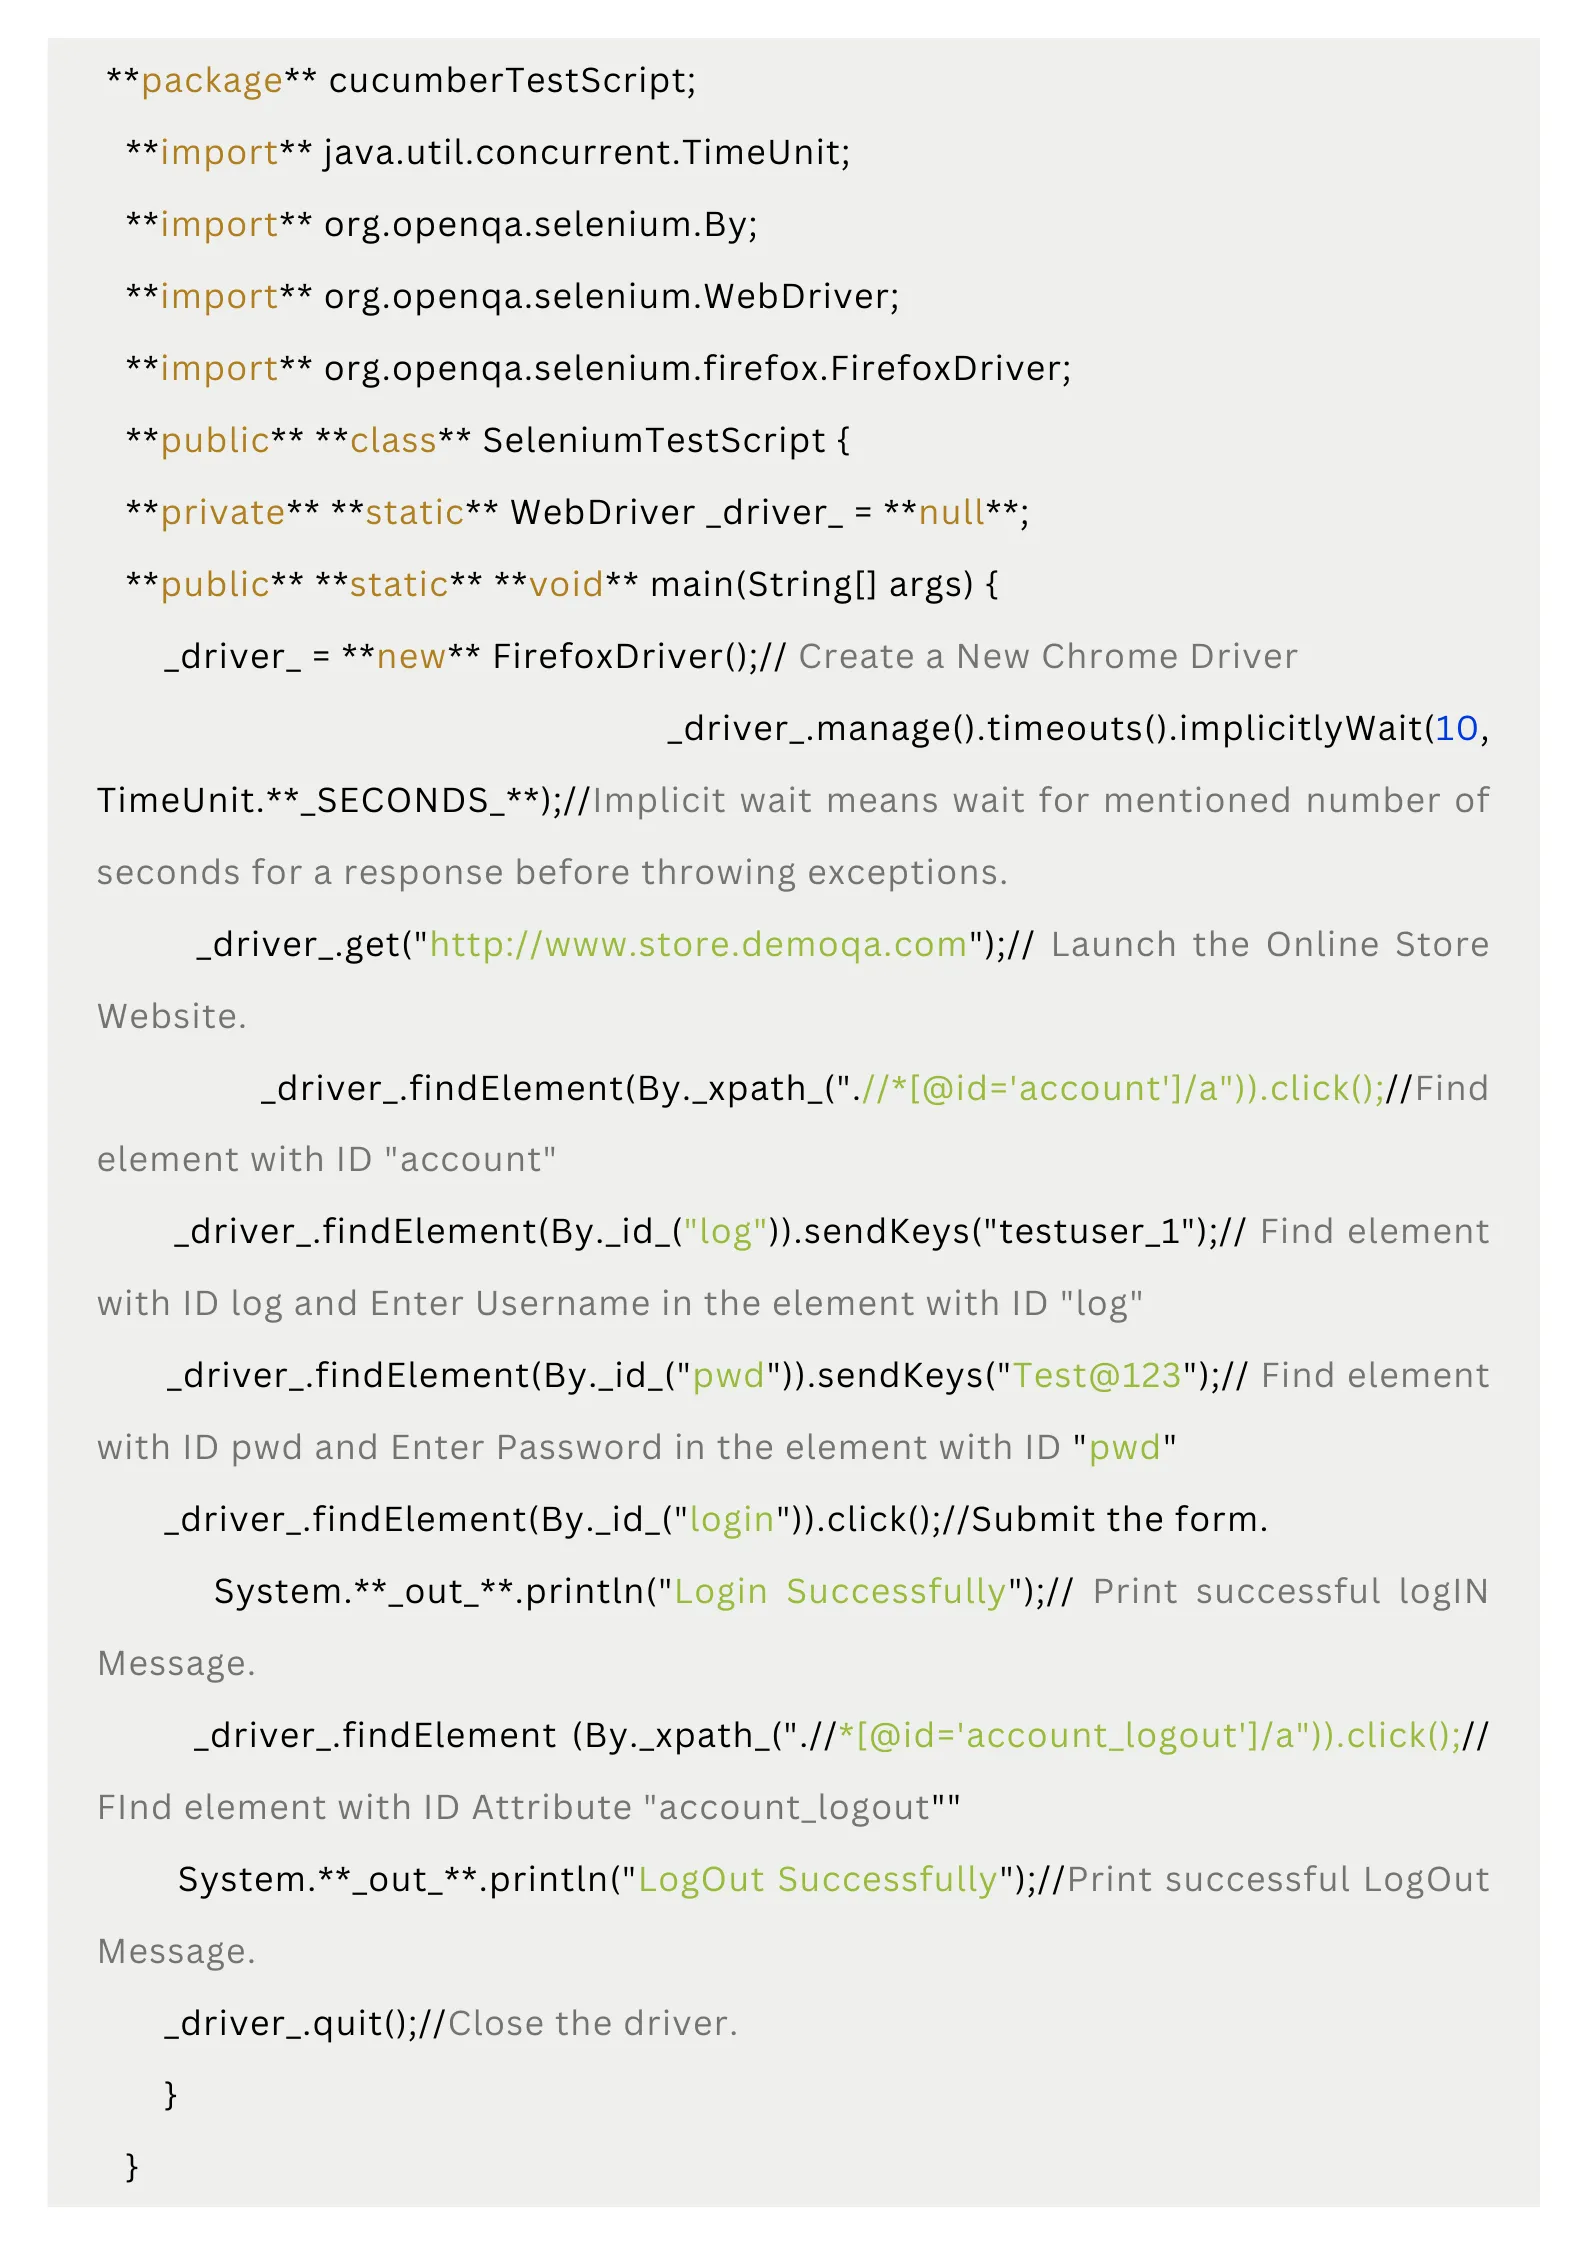
Right Click on the Eclipse code->Run As->Java Application.
After few seconds Chrome browser will open and you will see with the help of the script,Selenium will launch Online Store demo application and perform sign in.
Feature File
Feature file is an entry point to the cucumber tests. In this file we will describe test in descriptive language like English. It is an essential part of Cucumber as it serves as an automation script as well as a live Document.
Feature file can contain a scenario or many scenarios but usually it contains a list of scenarios.
Let’s get started with a Feature File.
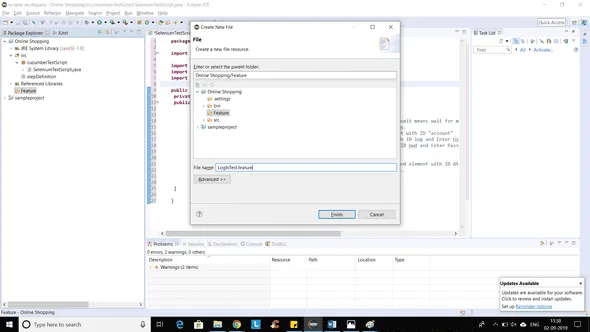
- Right click on Feature Folder-> New-> File.
- Name it “LogInTest.feature” and click on Finish button. “.feature” extension is important as it will help feature file to automatically detect the stories.

- We will write the first Cucumber Test Script.
- Feature: Login Action
Scenario: Successful Login with Valid Credentials
1. Given User is on Home Page
2. When User Navigate to LogIn Page
3. And User enters UserName and Password
4. Then Message displayed Login Successfully
Scenario: Successful LogOut
1. When User LogOut from the Application
2. Then Message displayed LogOut Successfully
Don’t worry about the syntax and how to write a Cucumber Test Script, we will learn to write a Test Script later in this article. Till then just have a look and get a basic understanding of intent of the test.
Keywords:
You must have noticed from the above screenshot, that there are some highlighted words in the file. These are the Keywords from Gherkin language. This language we use basically for writing test script in Cucumber feature file. There are many more keywords in Gherkin. We will discuss later in the article. For the time being we will focus on the following 4 keywords:
- Feature: This keyword gives the definition of feature you will be testing in the test below.
- Given: Tells the pre-condition of the test to be executed.
- And: Defines additional conditions of the test to be executed.
- Then: States the post condition of the test to be executed. You can also say that it is an expected result of the test.
Gherkin
Now let’s get back to Gherkin. It implements the principle of Business readable domain specific language(BRDSL). Domain specific language gives you the ability to describe your application behaviour.
Steps to install Natural Eclipse Editor for Gherkin:
You will get this option automatically when you create a file with .feature extension. Otherwise, you can anytime go to Eclipse Marketplace and look for the same to install it.
- Go to Help-> Eclipse Marketplace.
- Type “Natural” in the search bar.
- Select “Natural 0.7.6” option.
- Click on Install.
- This will give your another option- You would like to use it for Cucumber or JBehave Editior.Select Cucumber option and click on Confirm.

- Last step is to accept the Terms and Conditions.
- Once done, you will be asked to restart Eclipse.
Cucumber uses Junit framework to run tests. Since cucumber uses Junit, we need to have a Test Runner class. This class uses the annotation @RunWith(), It is like a starting point for Junit to start executing test.
- Right click on the package “cucumberTestScript”->New->Class.

- Name it “TestRunner” and click the Finish button.
TestRunner Class
.webp)
For the curious minds, we will discuss the code.
- import.org.junit.runner.RunWIth will import @RunWith annotation from Junit class. It tells Junit that test should start running using Cucumber class present in “Cucumber.api.junit” package.
- import.cucumber.api.junit.CucumberOptions imports @CucumberOptions annotation.This annotation tells Cucumber where to find feature file, what reporting system to use and many other things.
Now it's finally time to run the Cucumber Test
Click on the TestRunner class and click Run As->JUnit Test Application.
You must be wondering where is the java code that will execute for these tests? You need to wait for another 5 minutes as I will be discussing the Java code in a short moment. First observe the output on the console window that appears after running the code that we have created till now.
Our next target is to execute feature file. In order to test feature file, we need to write step definition for each step in the feature file.
When Cucumber executes a step in a Scenario it will look for a matching Step Definition to execute.
Step Definition is basically a java method in a class with an annotation above it.
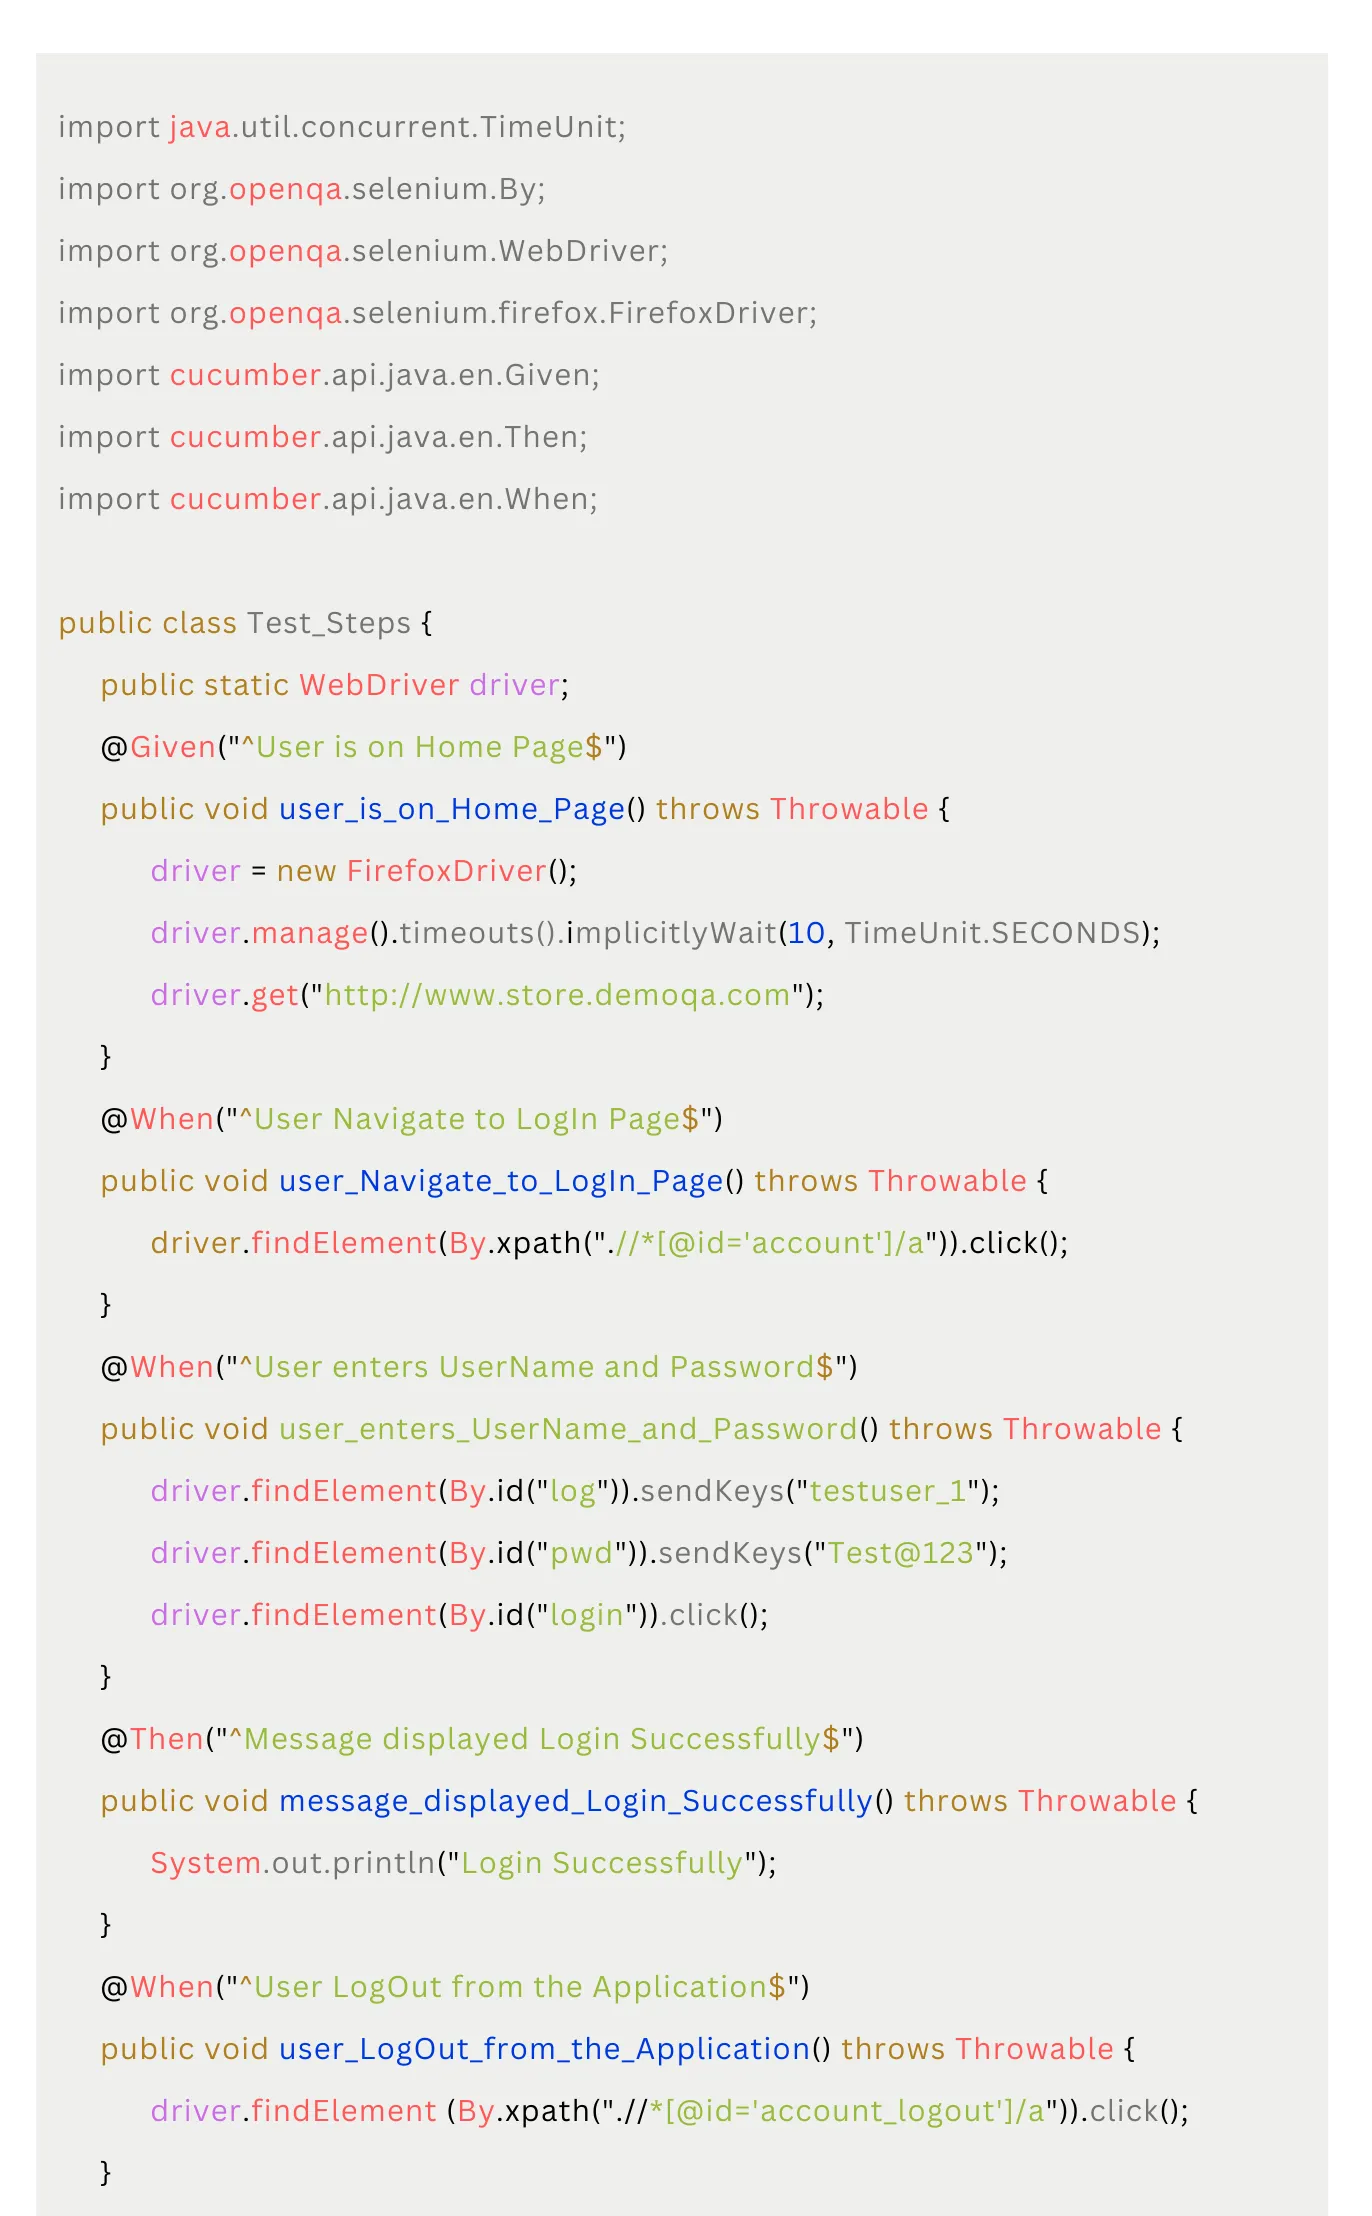
- Create a new Class file in the “stepDefinition” package and name it as “TestSteps” by right click on the package-> New->Class. Do not select the public static void main option and click on Finish button.
- Take a look at the message displayed in the console. Copy paste the text inside the red rectangle inside the TestSteps class created.
- package stepDefinition;
.webp)
4 .Now right click on the TestRunner class-> Run As->JUnit Test.
You will see that Cucumber successfully launches browser and logout successfully.
Cucumber starts with reading the feature file. The moment it encounters the first annotation @Given, it will find the matching method in the stepDefinition file and executes the code written inside the function.

%201.webp)