

I must say that when the first time I heard about Headless Browser, I was completely clueless about how a browser can be called Headless. Why there is a testing framework when we have such a good testing framework Selenium? But, let me say don’t compare Selenium and Headless Browser. Both of them are completely different. Both have different purposes.
A headless browser is a browser without a graphical user interface (GUI). They are executed via command line or via network communication. The main advantage they have over normal browsers is that they provide automated control of the web pages without using much CPU resources like memory, RAM.
On the other hand, Selenium is a portable testing framework for testing web applications. It also provides a record/ playback tool for authoring tests without the need to learn a test scripting language.
CasperJS is a Headless Browser Testing Framework. Till now in the last blog post, we have discussed what Headless Browser Testing is, what are the advantages and what are the limitations of this testing. Now, we will discuss a specific Headless Browser testing framework.
What is CasperJS?
CasperJS is a JavaScript framework built on top of PhantomJS (Webkit) and SlimerJS (Gecko). Now, you must be wondering, what is WebKit? and what is Gecko? Let me first explain a WebKit. Webkit is an open-source web browser engine rendering HTML, XHTML, CSS, XML images in Safari, Chrome and Opera. Gecko is a web browser engine for Firefox.
CasperJS is a Software testing services framework for page status, functional navigation, scraping data off the web page and screen capture.
CasperJS also allows assertions, which are an easier way to track failed tests.
We will start discussing a few functions that are most commonly used for testing.
CasperJS Modules
The most important feature of CasperJS is its tester module, where it offers a handful of functions that can testing processes using CasperJS.
We will be discussing the testing code to test the HTTP Status Code of the page after deployment.
Let’s first have a look at the list of some modules, then we will discuss the code for HTTP Status Code.
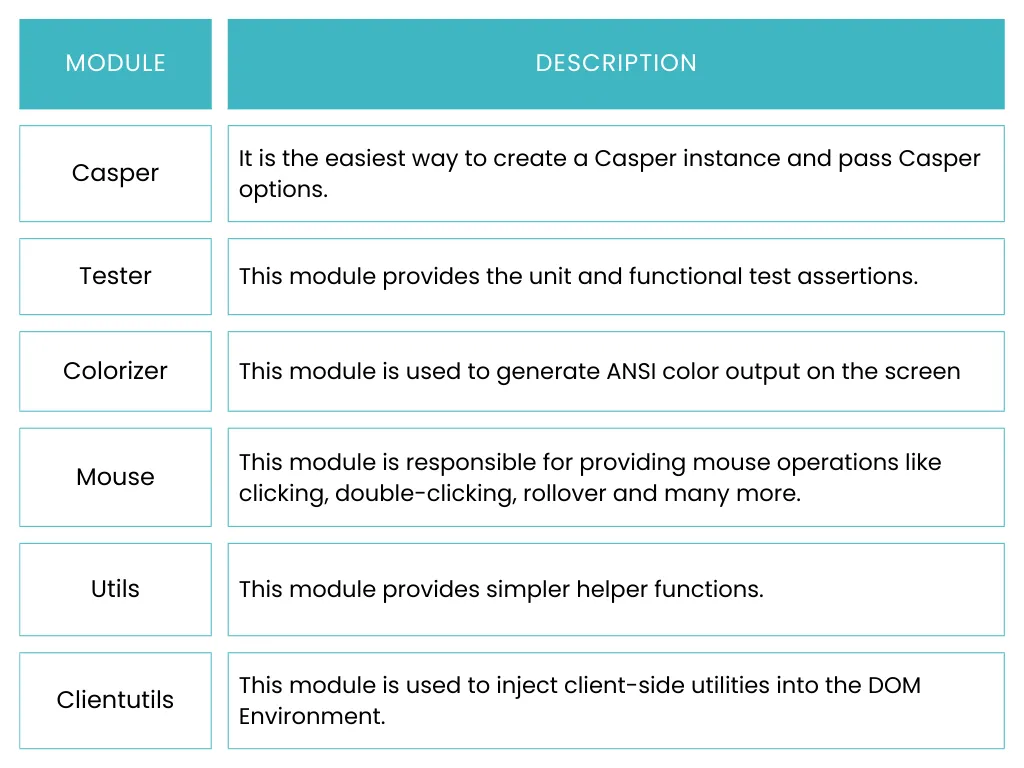
These are just a few modules out of so many modules that are available. It is highly recommended that you go through the API Documentation before proceeding for the coding part.
The CasperJS Documentation is a very good document listing all the functions with examples.
Install CasperJS
- Follow the link to install CasperJS.
- I will be discussing how to install CasperJS on Windows using npm.
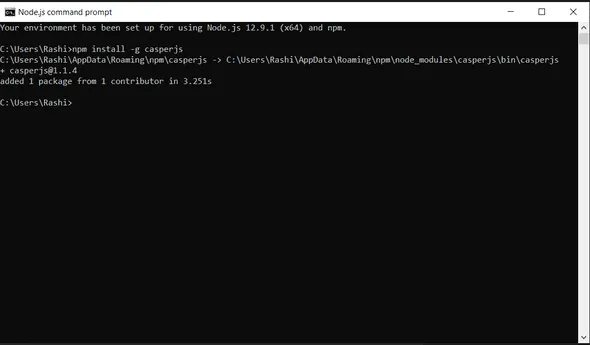
- You can install CasperJS using npm:
- Open the Node.js command prompt from the start menu.
- Type the following command in the terminal:
npm install -g casperjs
Install PhantomJS
- Go to the link to download Phantom for Windows.
- Download the zip file and extract the zip file.
- Once extracted the phantomjs.exe file is ready to use.
- You need to set the environment variable to use phantomjs without any headache.
- Right-click on My Computer or This PC.
- Select properties from the list.
- Go to Advanced System Settings from the left side Menu.
- Select Environment Variables from the window that pop-up.
- Now select the Path Variable to Edit either from the System or from the User Variable.
- Add the path of the phantomjs/bin folder to the Path Environment Variable.
- Open the command prompt.
- Type the command "phantomjs --version".
- Successful Installation will show the version number of phantomjs.

Now, it’s time to write a simple code to print the HTTP Status Code of a web page.
- Start your favorite editor and start writing this code.
- Save the file as “name.js”. It is mandatory to save the file with .js extension.
Code:
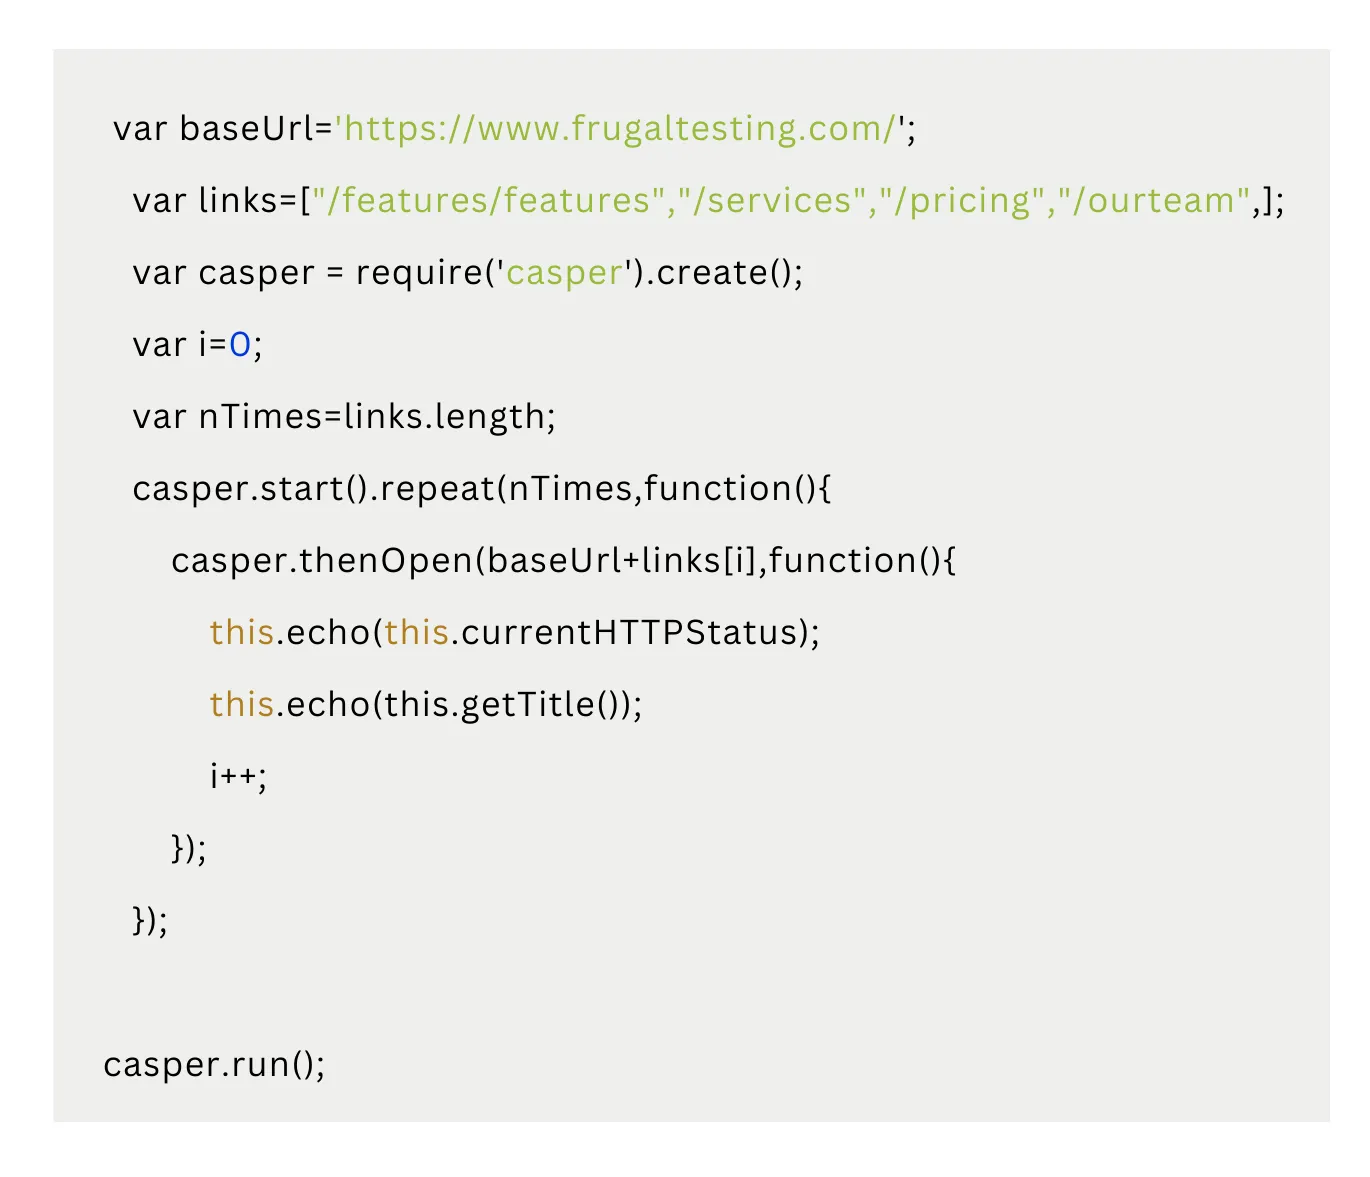
Let’s discuss the code in a bit detail. Here I am querying a web page www.frugaltesting.com. What I am doing is printing the title of 4 different pages of the main website and simultaneously printing the HTTP Status Code of the pages.
- I have initialized the baseUrl variable with the website Url.
- Links[] array specifies the part of links of the sub pages that will be appended to the baseUrl in order to generate the complete Url, that will be used to open the page.
- Next, we have created a new Casper instance.
- Initialized i=0 to use as index for the links[] array.
- Variable nTimes hold the length of the array links. For this case, nTimes=4 since links[] array has 4 items in it.
- Casper instance is then used to start the loop using repeat() function.
- Use casper instance to open the url using the thenOpen() function.
- this.echo() is used to print the title and HTTP Status Code of the page that is loaded.
- casper.run() is a very important function to run the whole thing. Without this function js file won’t be executed.
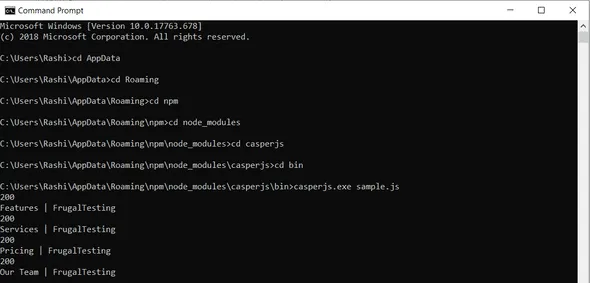
If you see the output below, you will notice that Page Title and HTTP Status Code 200 is printed. HTTP Status Code 200 means action requested by the client was received, understood and accepted.
With this, we are done with the basic code for CasperJS. Go ahead and feel free to experiment with all the Modules available in CasperJS and try all the functions.

%201.webp)