

Selenium has long been one of the most popular frameworks for automation in software testing, particularly for testing with selenium and selenium UI testing. As a leading automation testing tool, Selenium provides a comprehensive set of automation testing tools for running UI tests. It is an essential automation testing platform in the software development lifecycle, especially for quality assurance. While the Selenium WebDriver, often managed via WebDriver Manager Selenium, offers basic functionalities for web elements, the Action Class extends this functionality by enabling sophisticated user interactions that mimic real-world usage scenarios. This includes tasks like mouse movements, keyboard presses, mouse actions, and drag-and-drop functionality, which are critical for automation testing selenium and validating dynamic web applications.
The Action Interface is an integral part of the Selenium WebDriver API, designed to handle complex interactions beyond basic element identification and clicking. This interface is indispensable for testers using testing automation tools to validate user actions accurately. It allows you to automate intricate actions using Selenium actions, which is essential for testing automation and ensuring the web application’s interface behaves as expected.
In this guide, we will explore the Actions Class in Selenium, its methods, and how to use it to perform common tasks. By the end, you’ll be well-equipped to enhance your Selenium scripts with advanced user interaction capabilities, leveraging the full potential of this powerful automation testing tool selenium.
Key Takeaways 🚀
▶️The Action interface in Selenium test automation allows for advanced user interaction like mouse hover, right-click, drag-and-drop functionality, and keyboard events.
▶️It is essential for handling complex UI scenarios, especially when simple selenium WebDriver commands aren't enough.
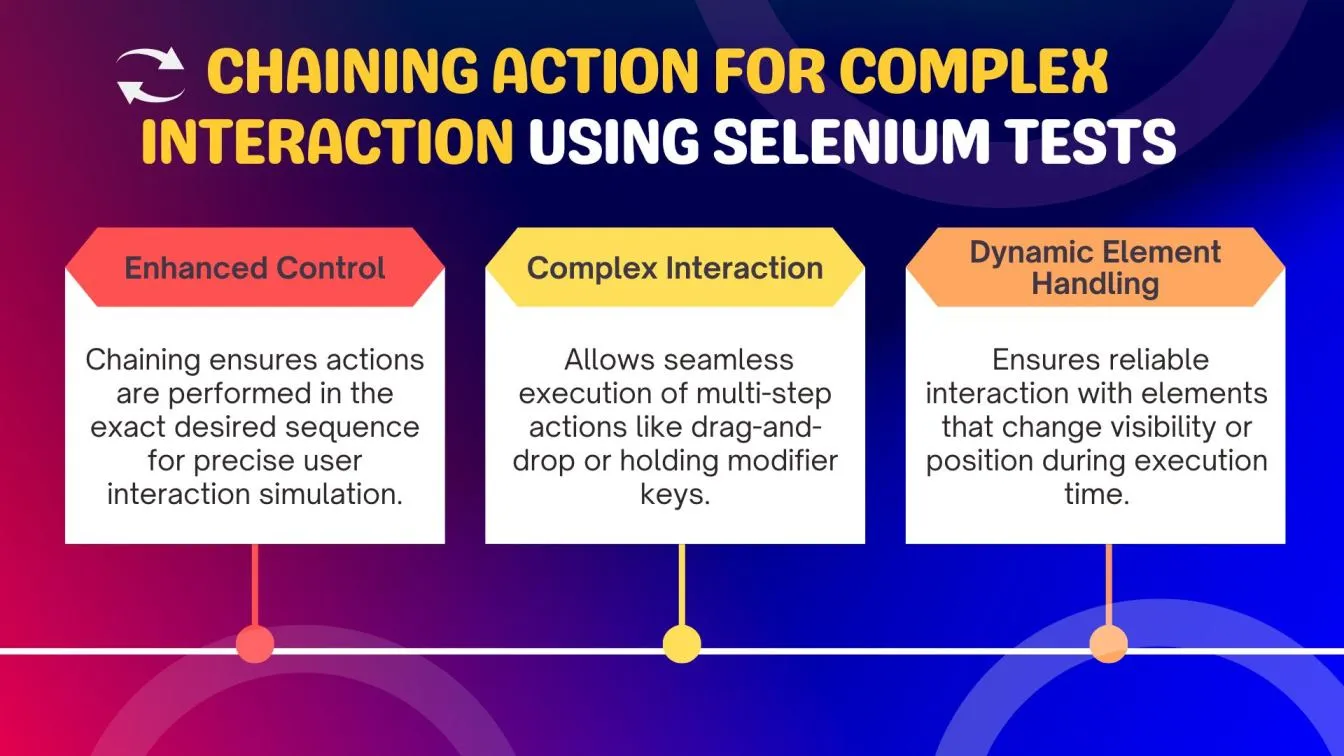
▶️The Action Class supports chaining multiple actions, which enables testers to write concise and efficient scripts.
▶️Mastering the Action Class improves the accuracy, efficiency, and reliability of your Selenium automated testing scripts for comprehensive testing.
What is the Action Class in Selenium & its importance?
The Actions Class in Selenium is a powerful tool that facilitates the simulation of real-world user interaction. It is part of the Selenium WebDriver API and allows for a range of advanced user actions not natively supported by basic Selenium commands. These interactions include mouse actions, movements, clicks, key presses, and drag-and-drop functionality.
Unlike basic WebDriver interactions that are primarily intended for interactive actions like clicking or typing, the Actions Class focuses on composite actions that require multiple steps to be performed in a sequence. For example, simulating a mouse hovering over a target element, pressing and releasing keys on the keyboard, selecting elements in drop-down boxes, or performing drag-and-drop operations.
Why is the Action Class Important?
The Action Class is an essential tool for several reasons:
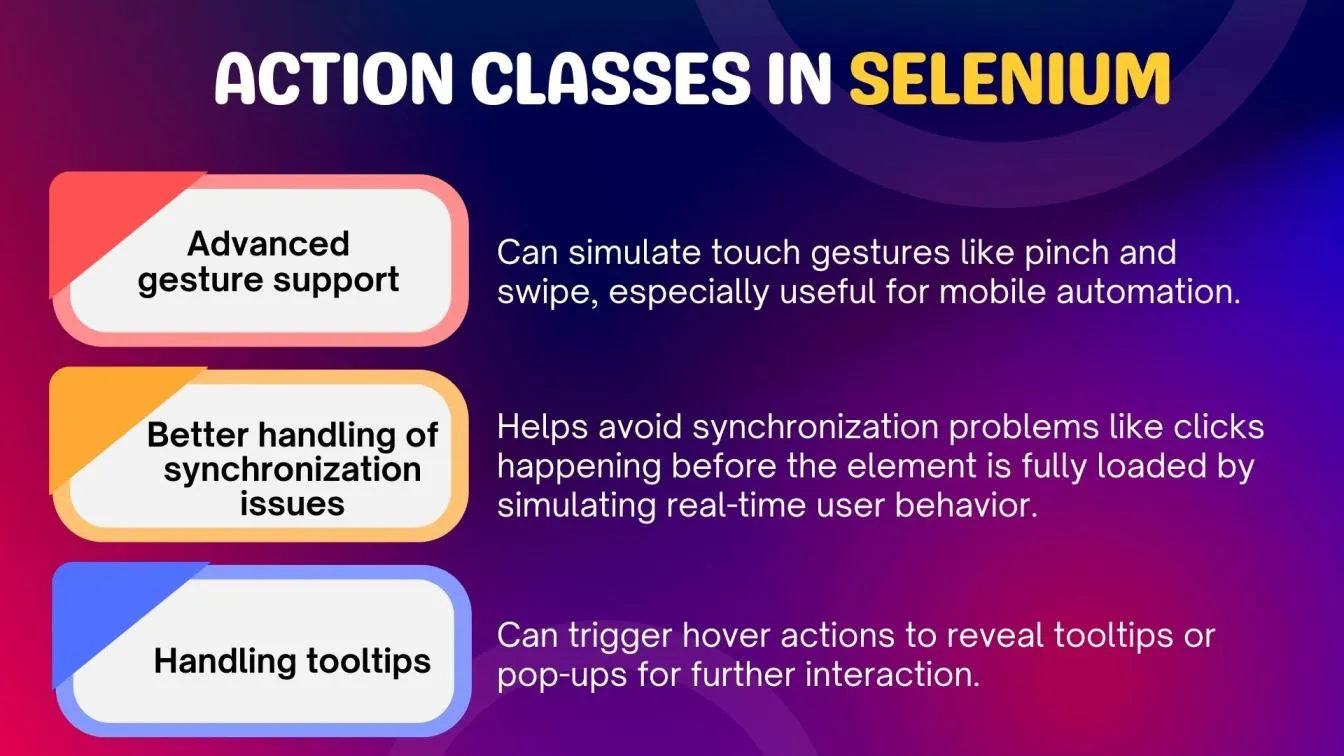
- Handling Complex Interactions: Simple Selenium WebDriver commands can’t simulate more complex interactions such as mouse actions, hover, multiple keyboard key presses, or drag-and-drop. Complex actions like these are essential for accurately testing dynamic web applications and ensuring the correct behavior of user interactions.
- Real-World User Behavior: By using the Actions Class, you can more closely simulate the software behavior of real users. For instance, a wide range of applications involve mouse hover events, keyboard actions, or context menus, and the Actions Class allows you to replicate these interactions in your tests. This helps ensure that the software behaves as expected when interacting with users in real-world scenarios.
- UI Testing: When working with dynamic and interactive user interfaces, the action Class is crucial for testing features like tooltips, dropdown menus, sliders, and sortable lists
Why Do We Use the Action Class?
While Selenium WebDriver provides the basic actions such as clicking, typing, and navigating, there are scenarios where more complex interactions are required. Some examples include:
⭐Mouse Hover: Some menus and tooltips are hidden until the user hovers the mouse over a certain target element from the current mouse location. The action Class enables testers to simulate this action.
⭐Drag and Drop: Testing drag-and-drop functionality is essential for applications involving sortable lists, file uploads, or visual elements. The action Class can simulate dragging an element from the source location and dropping it at the target location.
⭐Keyboard Events: Some web applications require simultaneous key presses or special key presses, such as Ctrl + A or Shift + Enter. The action Class allows testers to simulate such key combinations.
Without the action Class, simulating these software behaviors with standard Selenium WebDriver methods would be extremely difficult, making it an essential tool for comprehensive automation testing.
Basic Operations of the Action Class
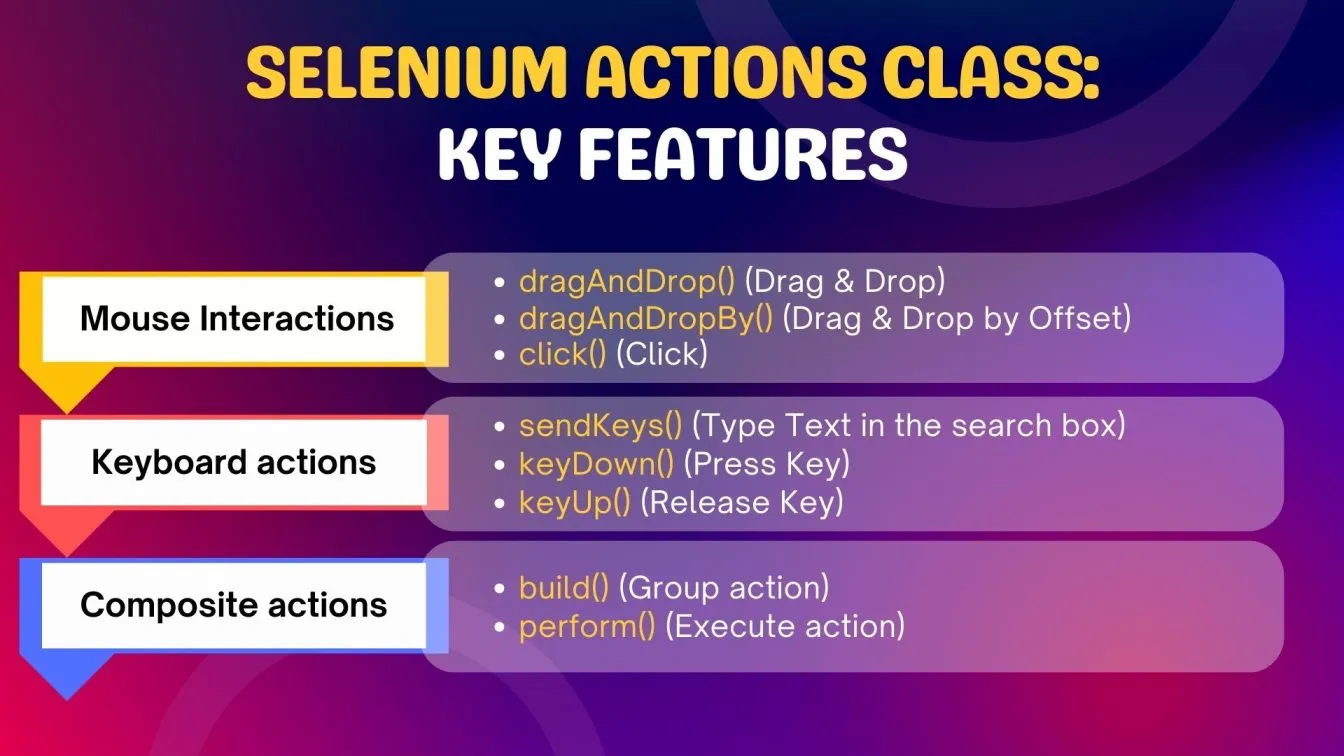
The action Class provides a wide range of methods for simulating various mouse and keyboard interactions. Here are some of the most commonly used mouse and keyboard operations:
1. Mouse Hover
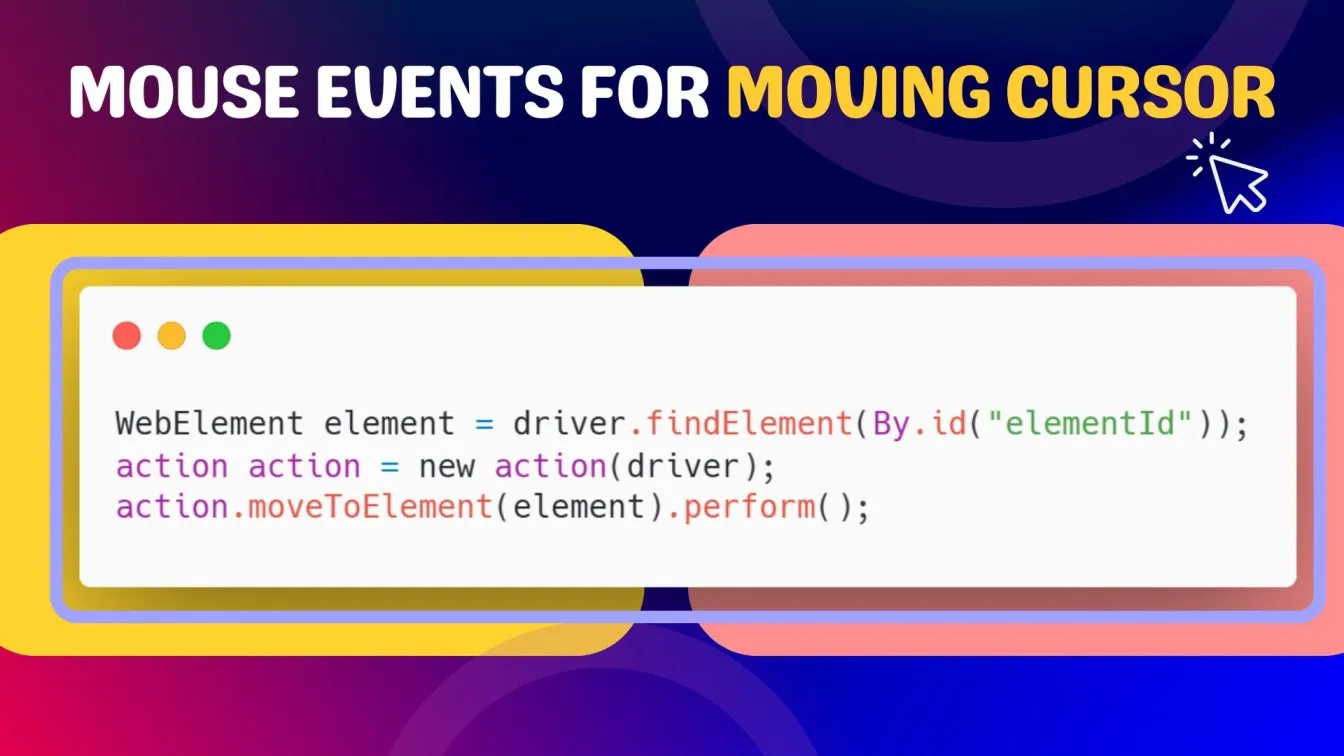
Mouse hover is an essential interaction used in web applications to reveal dropdown menus, tooltips, or additional options. The Action Class offers the moveToElement() method, which allows you to simulate hovering over a specific web element.
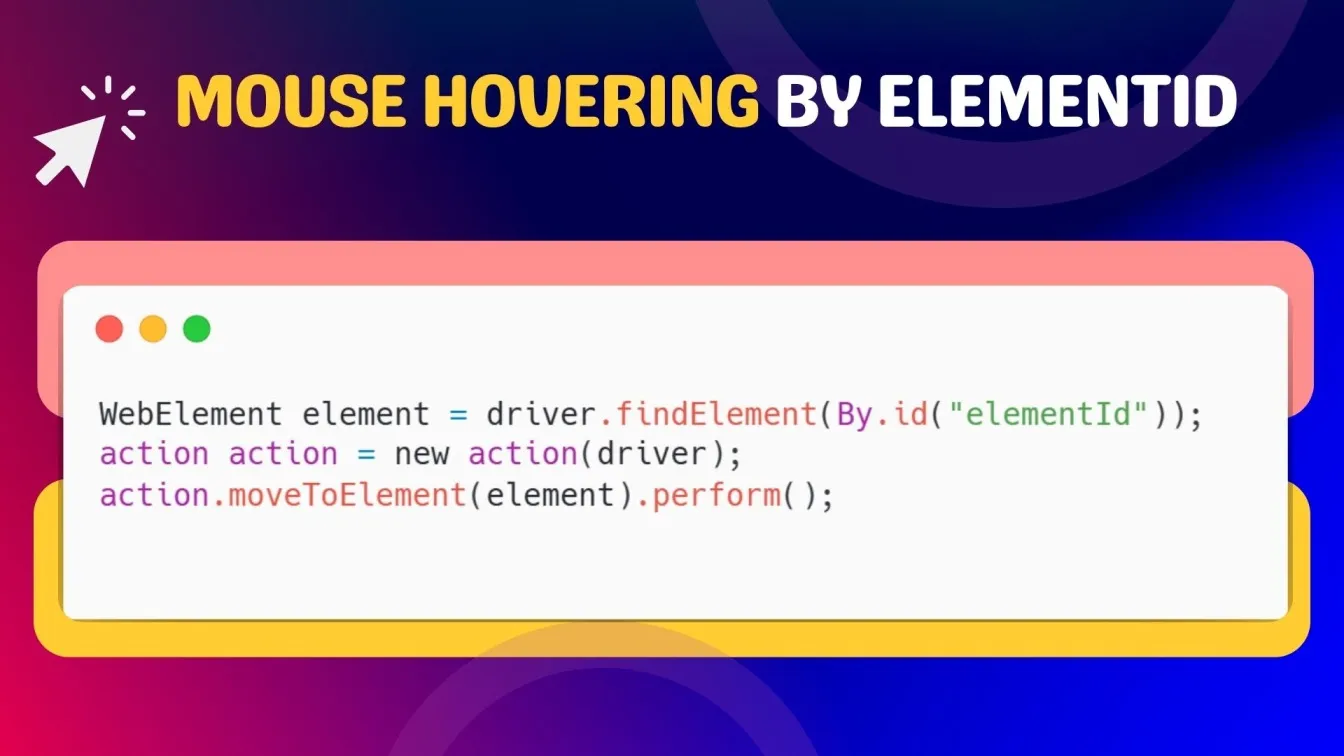
In this example, the moveToElement() method moves the mouse cursor to the center of the element specified. The perform method then triggers the action.
2. Right Click and Double Click
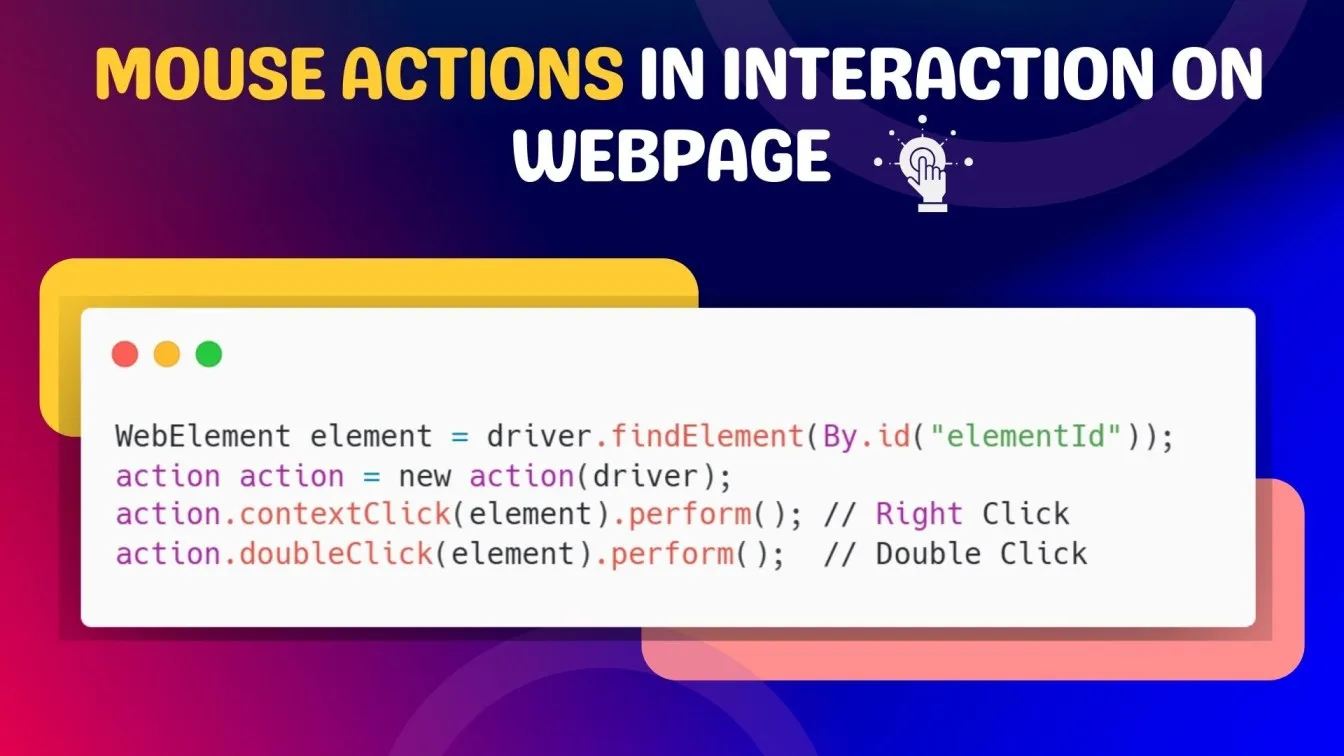
Right-click and double-click actions are common user interactions used to open context menus or trigger specific actions. You can easily simulate these actions with the action Class using the contextClick() and doubleClick() methods.
3. Drag and Drop
Drag-and-drop functionality is often used in web applications that allow users to reorder items, upload files, or interact with graphical elements. The Action Class provides the dragAndDrop() method, which simulates this interactable functionality.
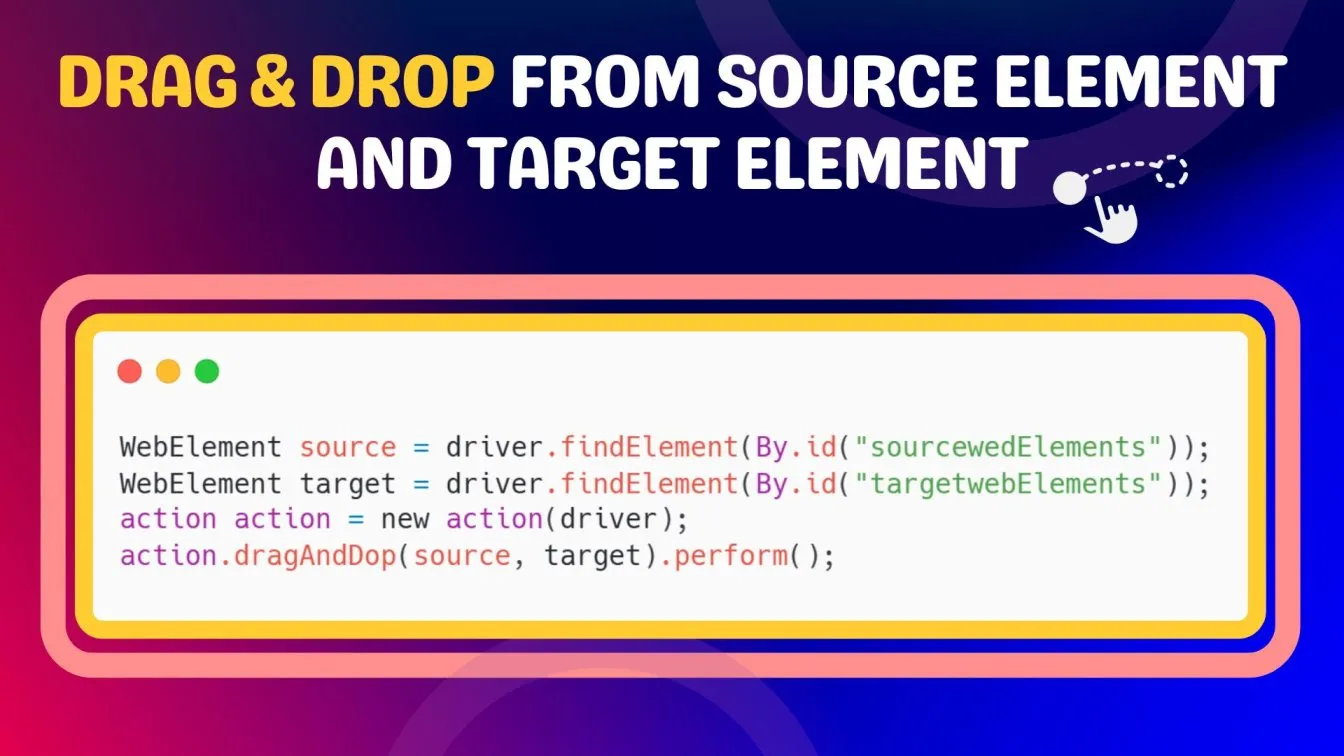
This automation code will drag the source element location and drop it onto the target location.
4. Key Press and Key Release
The Action Class can simulate a wide range of keyboard events, such as pressing and releasing keys. This is particularly useful for sending user input to form fields, performing keyboard interactions, shortcuts, or simulating complex user behavior.

In this example, the keyDown() and keyUp() methods simulate holding down and releasing the Control key, while the sendKeys() method simulates typing the letter "a".
Understanding the Syntax of the Action Class
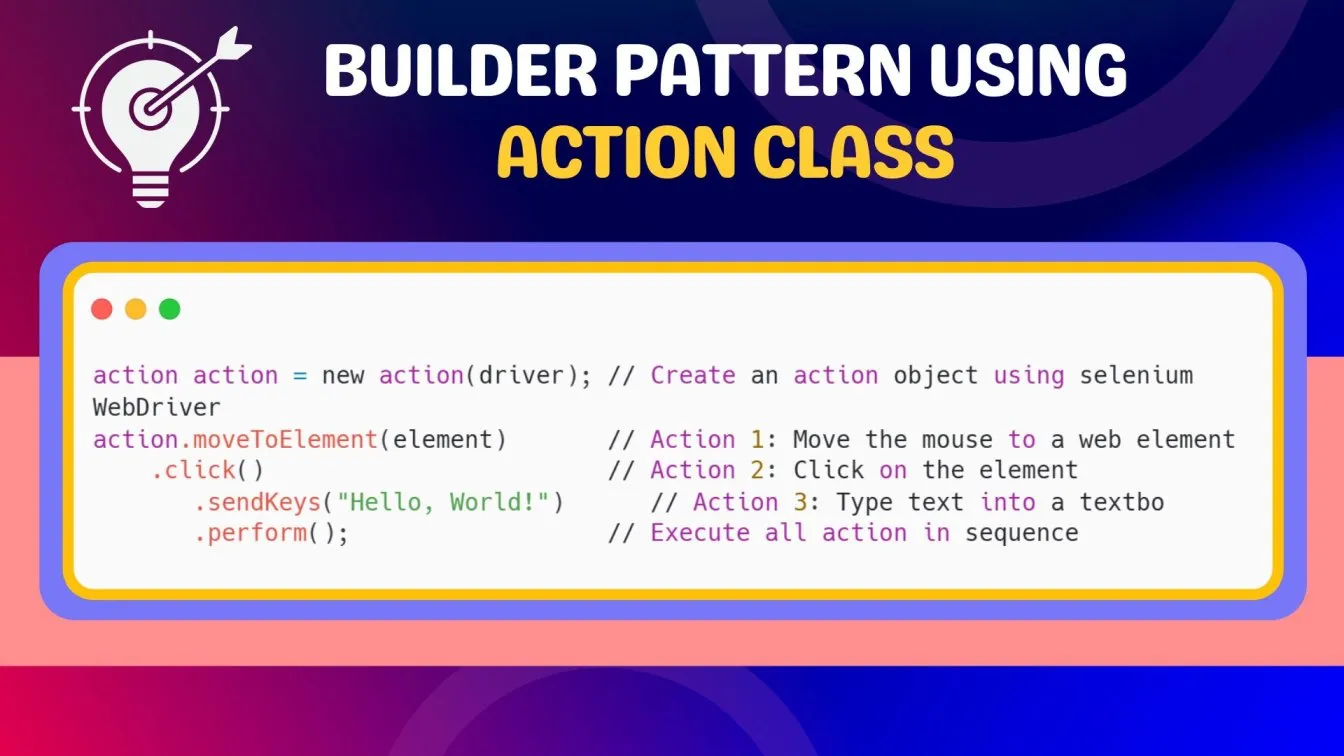
The action Class is designed to simulate advanced user interaction, such as mouse movements, javascript keyboard events, and drag-and-drop operations. It follows a design pattern known as the Builder Pattern. This pattern allows you to chain multiple actions together into a single sequence, and then execute them all at once using the perform method. The builder pattern is particularly useful because it helps to organize and structure the code, making it cleaner and easier to understand.
The Builder Pattern in the action class
The Builder Pattern is a design pattern used to construct complex object types. In the case of the action class, it allows you to add multiple actions to a sequence, where each action represents a user interaction, such as clicking, dragging, or pressing a key. These actions are not executed immediately. Instead, they are stored and queued up until the perform() method is called. This action class method will then execute all the queued actions in the order they were added.
Here’s an example of the basic syntax:
Using the action Class for Mouse Movements
The action Class includes a wide range of methods for simulating mouse events in selenium. You can move the mouse pointer to a specific element, move it by a certain offset, or even click ( left mouse button or right mouse button) on elements while the mouse is in a particular position.
1. Moving to an Element
The moveToElement() method moves the mouse pointer to the center of a specific element, which is useful for testing hover actions and tooltips.
2. Moving by Offset
The moveByOffset(x-offset, y-offset) method moves the mouse pointer by a specified offset from the current mouse location. This is useful for testing interactions where the mouse needs to be moved by a set distance.

In this case, the mouse pointer will be moved 100 pixels to the right and 50 pixels down from its current location.
Keyboard actions with the action Class
The action Class also supports a wide range of keyboard events, allowing you to simulate key presses and combinations for testing keyboard-driven interaction.
1. Simulating Keyboard Key Press
You can use the sendKeys() method to simulate typing into an input field or sending a sequence of keyboard inputs based on pressing keys.

2. Handling Special Keys
The action Class allows you to handle special keys such as Ctrl, Shift, and Alt using the keyDown() and keyUp() methods. This is particularly useful for testing keyboard inputs for shortcuts and combinations.
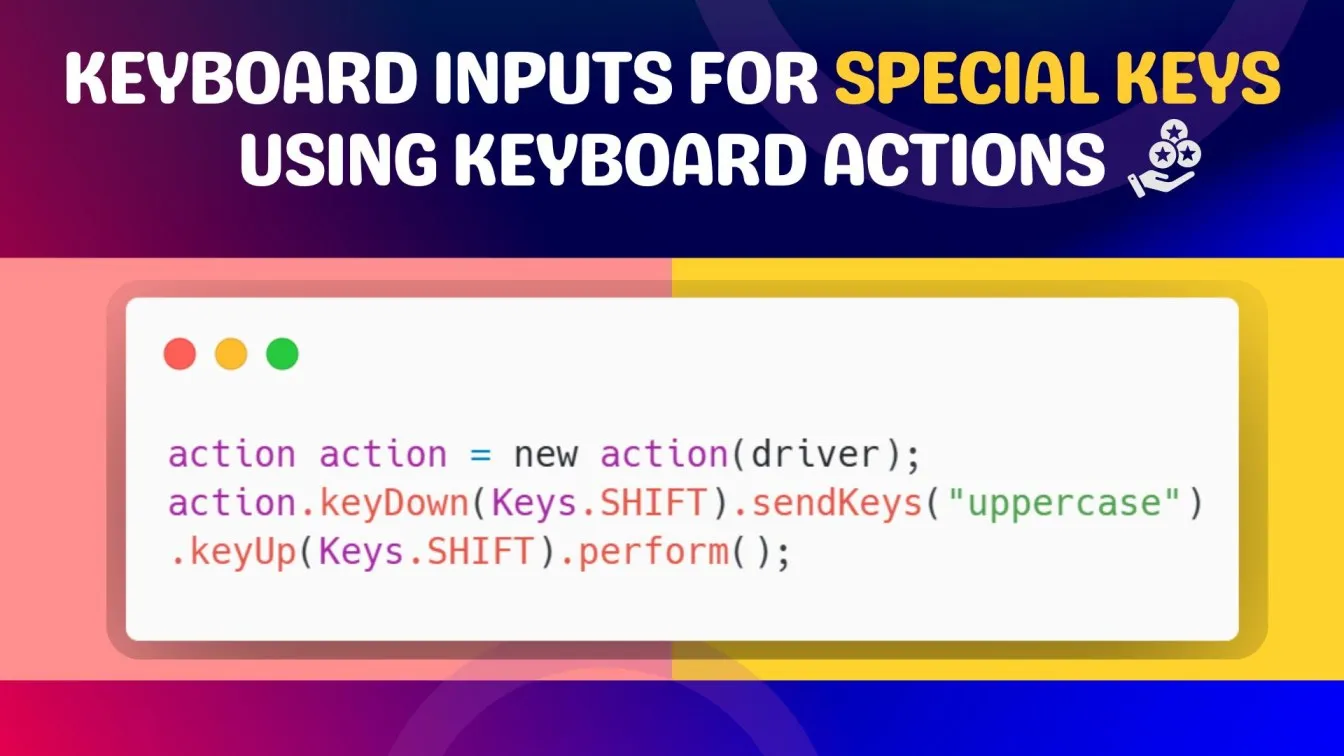
In this example, the Shift key is held down while typing the text "uppercase", ensuring that the text is capitalized.
Chaining Multiple actions in the Builder Pattern
The power of the action Class comes from its ability to chain multiple actions. This is done by appending each action to the previous one. Each action method call returns an action object, so you can keep chaining as many actions as needed.
For example, consider a scenario where you need to:
- Move the mouse pointer to an element.
- Right-click the element.
- Select an option from the context menu that appears.
- Then, perform some keyboard actions.
This could be written as follows:

This entire sequence of action will be executed sequentially once the perform() method is called in the automation code.
Why Is Chaining Action So Useful?
Chaining a series of actions is useful because it allows you to create complex user interactions while keeping the code clean, organized, and efficient. Here's why it's beneficial:
- Efficiency:
- Instead of performing each action separately, chaining them in a single sequence reduces the number of method calls and provides a clear flow of the action. This leads to better performance and less redundancy in the code.
- Readability:
- Chaining actions together makes the code more readable. When all actions are defined in a single statement, it’s easier to follow the sequence of events and understand the logic behind the automation code.
- Organized Code:
- The builder pattern ensures that all actions are queued and executed in the exact sequence. This eliminates the possibility of accidental executions out of order or repeated action.
- Simplicity:
- The builder pattern simplifies the code by allowing the combination of many actions in a concise way. Without the builder pattern, you would need to break down every action into separate statements and execute them individually, which would lead to a more verbose and less maintainable codebase.
Perform vs. Build Method in action Class
The action Class provides two important methods for executing an action: perform() and build(). The perform() method executes the defined action immediately in the specified sequence. The build() method compiles action into a composite action, allowing it to be executed later. Both methods offer flexibility in controlling when and how actions are performed in Selenium automation scripts.
The perform() Method
The perform() method in the action Class is used to immediately execute the set of actions that were previously defined. It performs all the action sequentially, as per the order in which they were chained, when it is called.
When to Use perform():
- You want to execute actions right away as soon as they are defined.
- It's the preferred method when you have a simple sequence of actions that need to be carried out in real time.
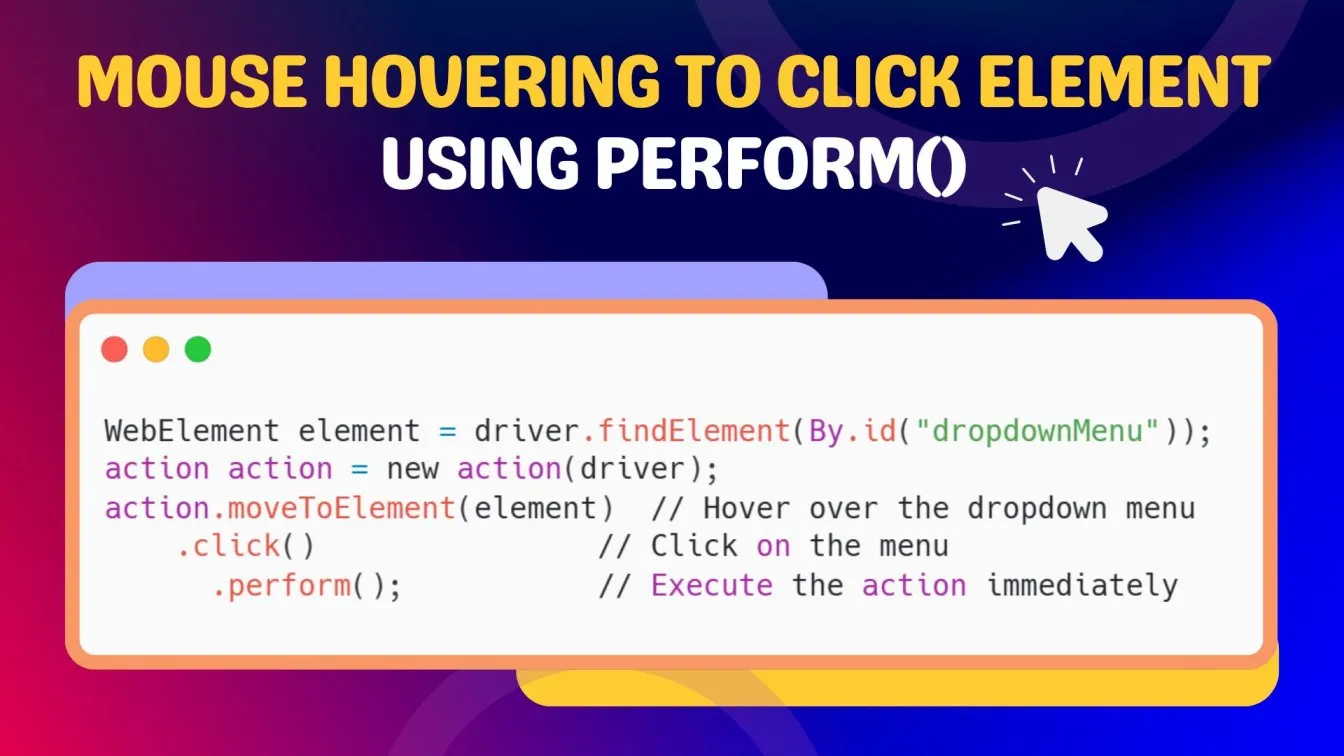
Basic Mouse Interaction with perform()
Let’s consider a scenario where you need to simulate a mouse hover and perform a right-click operation on an element. Using perform(), these actions will be executed immediately when called.
The build() Method
The build() method in the Action class compiles the action into a single composite action but does not execute it immediately. Instead, it allows you to define and execute a sequence of actions later. The build() method is particularly useful when you need to store and execute an action in a specific context, such as within a testing framework or if you want to act conditionally. This approach follows the design pattern of Command, where a request is encapsulated as an object, allowing for parameterization of clients with queues, requests, and operations.
When to Use build():
- You want to compile a set of actions into a single composite action that can be executed later.
- Useful in complex scenarios where you want to execute the action in a specific test case or after a particular condition is met.
- Ideal for reusable action sequences or executing complex workflows at a later stage in your test.
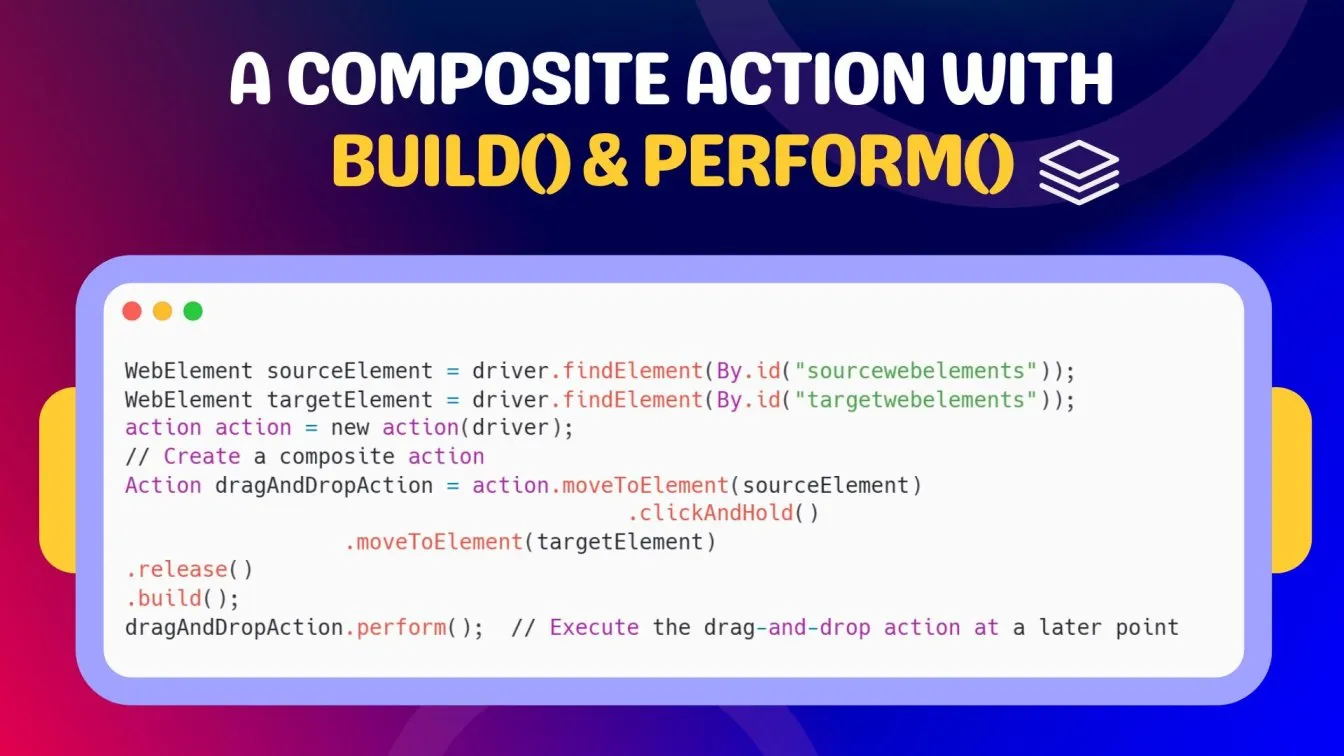
Defining a Composite Action with build()
Let’s assume that you need to drag an element and drop it in a specific place on the page. You might want to define this set of actions and execute them later:
Common Challenges and Troubleshooting in Using the Action Class
While the action Class is a powerful tool, it is not without its challenges. Here are some common issues you may encounter and how to resolve them:
- Element Not Found: Ensure that the element is visible and interactable before performing action. You can use explicit waits to wait for elements to be present and ready for interaction.
- Timing Issues: Selenium actions interact with elements based on the page’s rendering. Dynamic content may not be fully loaded before acting, so using explicit waits (WebDriverWait) is crucial for handling timing issues.
- Browser Compatibility: Actions may behave differently across browsers and in any browser version. Always test your scripts on multiple browsers with their browser driver (Chrome, Firefox, Safari) to ensure cross-browser compatibility
Conclusion
In conclusion, the Action Class in Selenium WebDriver is a powerful tool for handling complex user gestures like keyboard actions, mouse clicks, Drag-and-Drop Actions, and Hover Actions. By leveraging javaActions actions or private Actions actions, testers can simulate interactive actions with precision, ensuring consistent behavior across real devices and browsers. This enhances automation capabilities, enabling the creation of robust automation scripts that accurately target web elements such as a search button or an active element. Whether it’s editing actions, element positioning, or handling input parameters from input devices, the Action Class simplifies cross-browser testing with simple code. Additionally, it supports basic mouse automation and application automation functions, addressing OS-specific behaviour to provide effective solutions. By using a driver argument or an Access Key, testers can further refine their scripts, ensuring a seamless user experience. Mastering the Action Class is essential for automating complex user gestures and achieving reliable results using the Selenium testing framework.
People Also Ask
What is context click on selenium?
A context-click in Selenium simulates a right-click action on a web element using the contextClick() method from the Action Class, often used to trigger context menus.
Why do we pass the driver in action class?
The driver is passed to the Action class to associate it with the WebDriver instance, enabling the execution of user interactions like mouse and keyboard actions on the browser.
Which class is used for dropdown in selenium?
The Select class in Selenium is used to handle dropdowns, providing methods like selectByVisibleText(), selectByValue(), and selectByIndex().
What are implicit wait and explicit wait?
Implicit wait sets a global timeout for element searches, while explicit wait targets specific elements with custom conditions using WebDriverWait.
How to handle dynamic elements in selenium?
Use explicit wait with conditions like visibilityOfElementLocated() or locate elements using dynamic XPath/CSS selectors to handle dynamically changing attributes.

%201.webp)